Year 8 - Collage and Painting Unit
( if you miss the lesson for any reason you should still complete both classwork and homework)
This unit of work is about:
Learning about different types of collage
Creating collage work
Developing accurate drawing and painting skills
UNIT ARTISTS : Barbara Kruger, David Hockney Hannah Hoch, Henri Matisse, Kurt Schwitters, Man Ray, Nick Gentry, Peter Blake, Pablo Picasso, Raoul Hausmann, Richard Hamilton, Robert Rauschenberg
UNIT VOCABULARY: Collage, Assemblage, Mixed Media, Photocollage, Joiners, Photograms, Photomontage, Combines, Cut-Outs, Decoupage, craft Knife, Cutting Board, Silhouette, Frame, Natural Objects, Man-Made Objects, Pointers of Reference, Measuring, Guidelines, Ghosting, Painting, Blending, Mixing and Matching Colour
Lesson 1
Classwork : The ‘Collage/Painting Project’ introduction video can be re-played if necessary.
Collage Painting Introduction
Students then watch the ‘Making a Collage 1’ video and produce the collage frame. Some students may also start to arrange and stick down the collage items.
Making the Collage - Tracing and Cutting
Homework : Students may wish to collect more collage items to stick down next lesson and improve the collage frame cut-out (if you have access to a craft knife at home). It is also a very good idea to cut-out and arrange objects on the second piece of card (no gaps and without actually sticking them down). This will make sticking down much quicker in Lesson 2. Also take a photo of you arrangement on a phone as shown in the ‘Preparing the Collage’ video and pictures below.
Preparing the Collage
Can you see which wrapper the student has failed to be trim?


Lesson 2
Classwork : Students watch the ‘Making a Collage 2’ video and arrange and stick down the collage items, then final stick down the frame.
Making the Collage - Arranging and Sticking
Homework : Complete the collage (this should have complete.
Lesson 3
Classwork : In Year 7 students copied an artist’s drawing by measuring the work. Later in Year 7 they reproduced and enlarged the teddy bear still-life and self-portrait using the ’gridded enlargement’ method. In Year 8 student will enlarge the collage using the ‘points of reference’ system.
Students watch the ‘Collage Enlargement 1’ video below. Using the the points of reference system shown in the video to enlarge the collage shape outline by 1.5 times. Work on watercolour paper.
If you are isolating you should work on A4 paper to practice the technique. When you return to school you should collect the watercolour paper.
Collage Enlargement 1 - Enlarging the Basic Shape
Homework: Complete drawing the collage animal outline (remember it is enlarged by 1.5 times) . Do not start drawing the details or wrappers.
Lesson 4
Classwork : Watch the ‘Artists who use Collage Slide Show’ video using the ‘Artists who use Collage Handout’ below. The video should be paused at the appropriate point so student can split up a sketchbook page and write down the collage key term.
When watching the video students should take high quality notes on the various artists and also on the collage key terms. There will not be a test on these artists (as there were in Year 7), but marks will be based on the quality of notes and research information, as well as PRESENTATION.
NOTE: Students should look out for a couple of changes to the Man Ray images and also a Raoul Hausmann collage.
Artists who use Collage Slide Show
Homework: Watch the ‘Artists who use Collage Slide Show’ video again, and complete any missing class notes on the ‘Artists who use Collage Handout’. Also research the ‘types of collage’ descriptions/definitions for the right hand page, as described in the video.

Excellence+ High quality notes and in-depth definitions of key term and the artists who use this type of collage, as well wonderful presentation

Developing Very good notes (secure+ quality) on the handout but some definitions of key term are missing and the presentation is poor.

Excellence- High quality notes and in-depth definitions of key term and the artists who use this type of collage. Presentation could be a little more exciting and colourful
Lesson 5
Classwork : Boys now have 7 weeks to complete the collage painting. Students start this lesson by watching the ‘Collage Enlargement 2’ video below and accurately with measurements drawing out the outlines of the wrappers (no details). It is expected that boys will draw the outline of the wrappers and only one wrapper complete with lettering during the lesson.
Collage Enlargement 2 - Drawing the Object Outlines
Later in the lesson it is expected that students will draw the outline of the wrappers, watching the the ‘Collage Drawing -Common Mistakes’ video below will help student work accurately when drawing the wrappers and lettering.
Collage Drawing - Common Mistakes
Homework: Complete drawing the outlines of the wrappers (no details), and the detail, such as lettering, for two of the easier wrappers discussed in class. Students will also need to bring in paints and brushes. The ‘Collage Drawing -Common Mistakes’ video below will help student work accurately when drawing the wrappers and lettering. Some students may wish to get ahead and draw out all of the wrappers and lettering.
Lesson 6
Classwork : The techniques of measuring, guidelines and ghosting should have been used to draw out the details and lettering. Today students start painting. Students watch the ‘Collage Painting - Common Mistakes’ video below. They should start painting one wrapper in class, and aim to start painting a simple wrapper, for example one with large lettering and just two flat colours. Students will discuss the collage item they wish to paint first, and also check the painting of each section of the first of first wrapper with .
Collage Painting - Common Mistakes
Homework : Complete the first collage item, and also draw out another item. Some student my be asked to paint or draw additional items, depending on their progress in class.
Lessons 7, 8, & 9
Classwork : Students continue working on the collage painting, managing their time (in class and at home) effectively to complete the painting to a high standard.
Students will need to seek advice in the lesson on what object to paint next (concentrating on the simple objects first and then increasingly more difficult items with blending and fine details).
As a guide student will be painting one object per week, starting this in class and completing the object/wrapper for homework.
In Lesson 9 all students will paint the leaf as shown in the video below.
Collage Painting Skills 2 - Blending Paint and Fine Details
Homework : Continue working on the collage drawing painting. You will be told in the lesson what to paint next (concentrating on the simple objects first and then increasingly more difficult items with blending and fine details).
Lessons 10
Classwork : This is the Final lesson. In the last lesson students were told to complete the work for homework and thus this lesson will be used as an improvement lesson. Some students may wish to use white acrylic as discussed in class.
The are assessment examples below that can be used for reference.
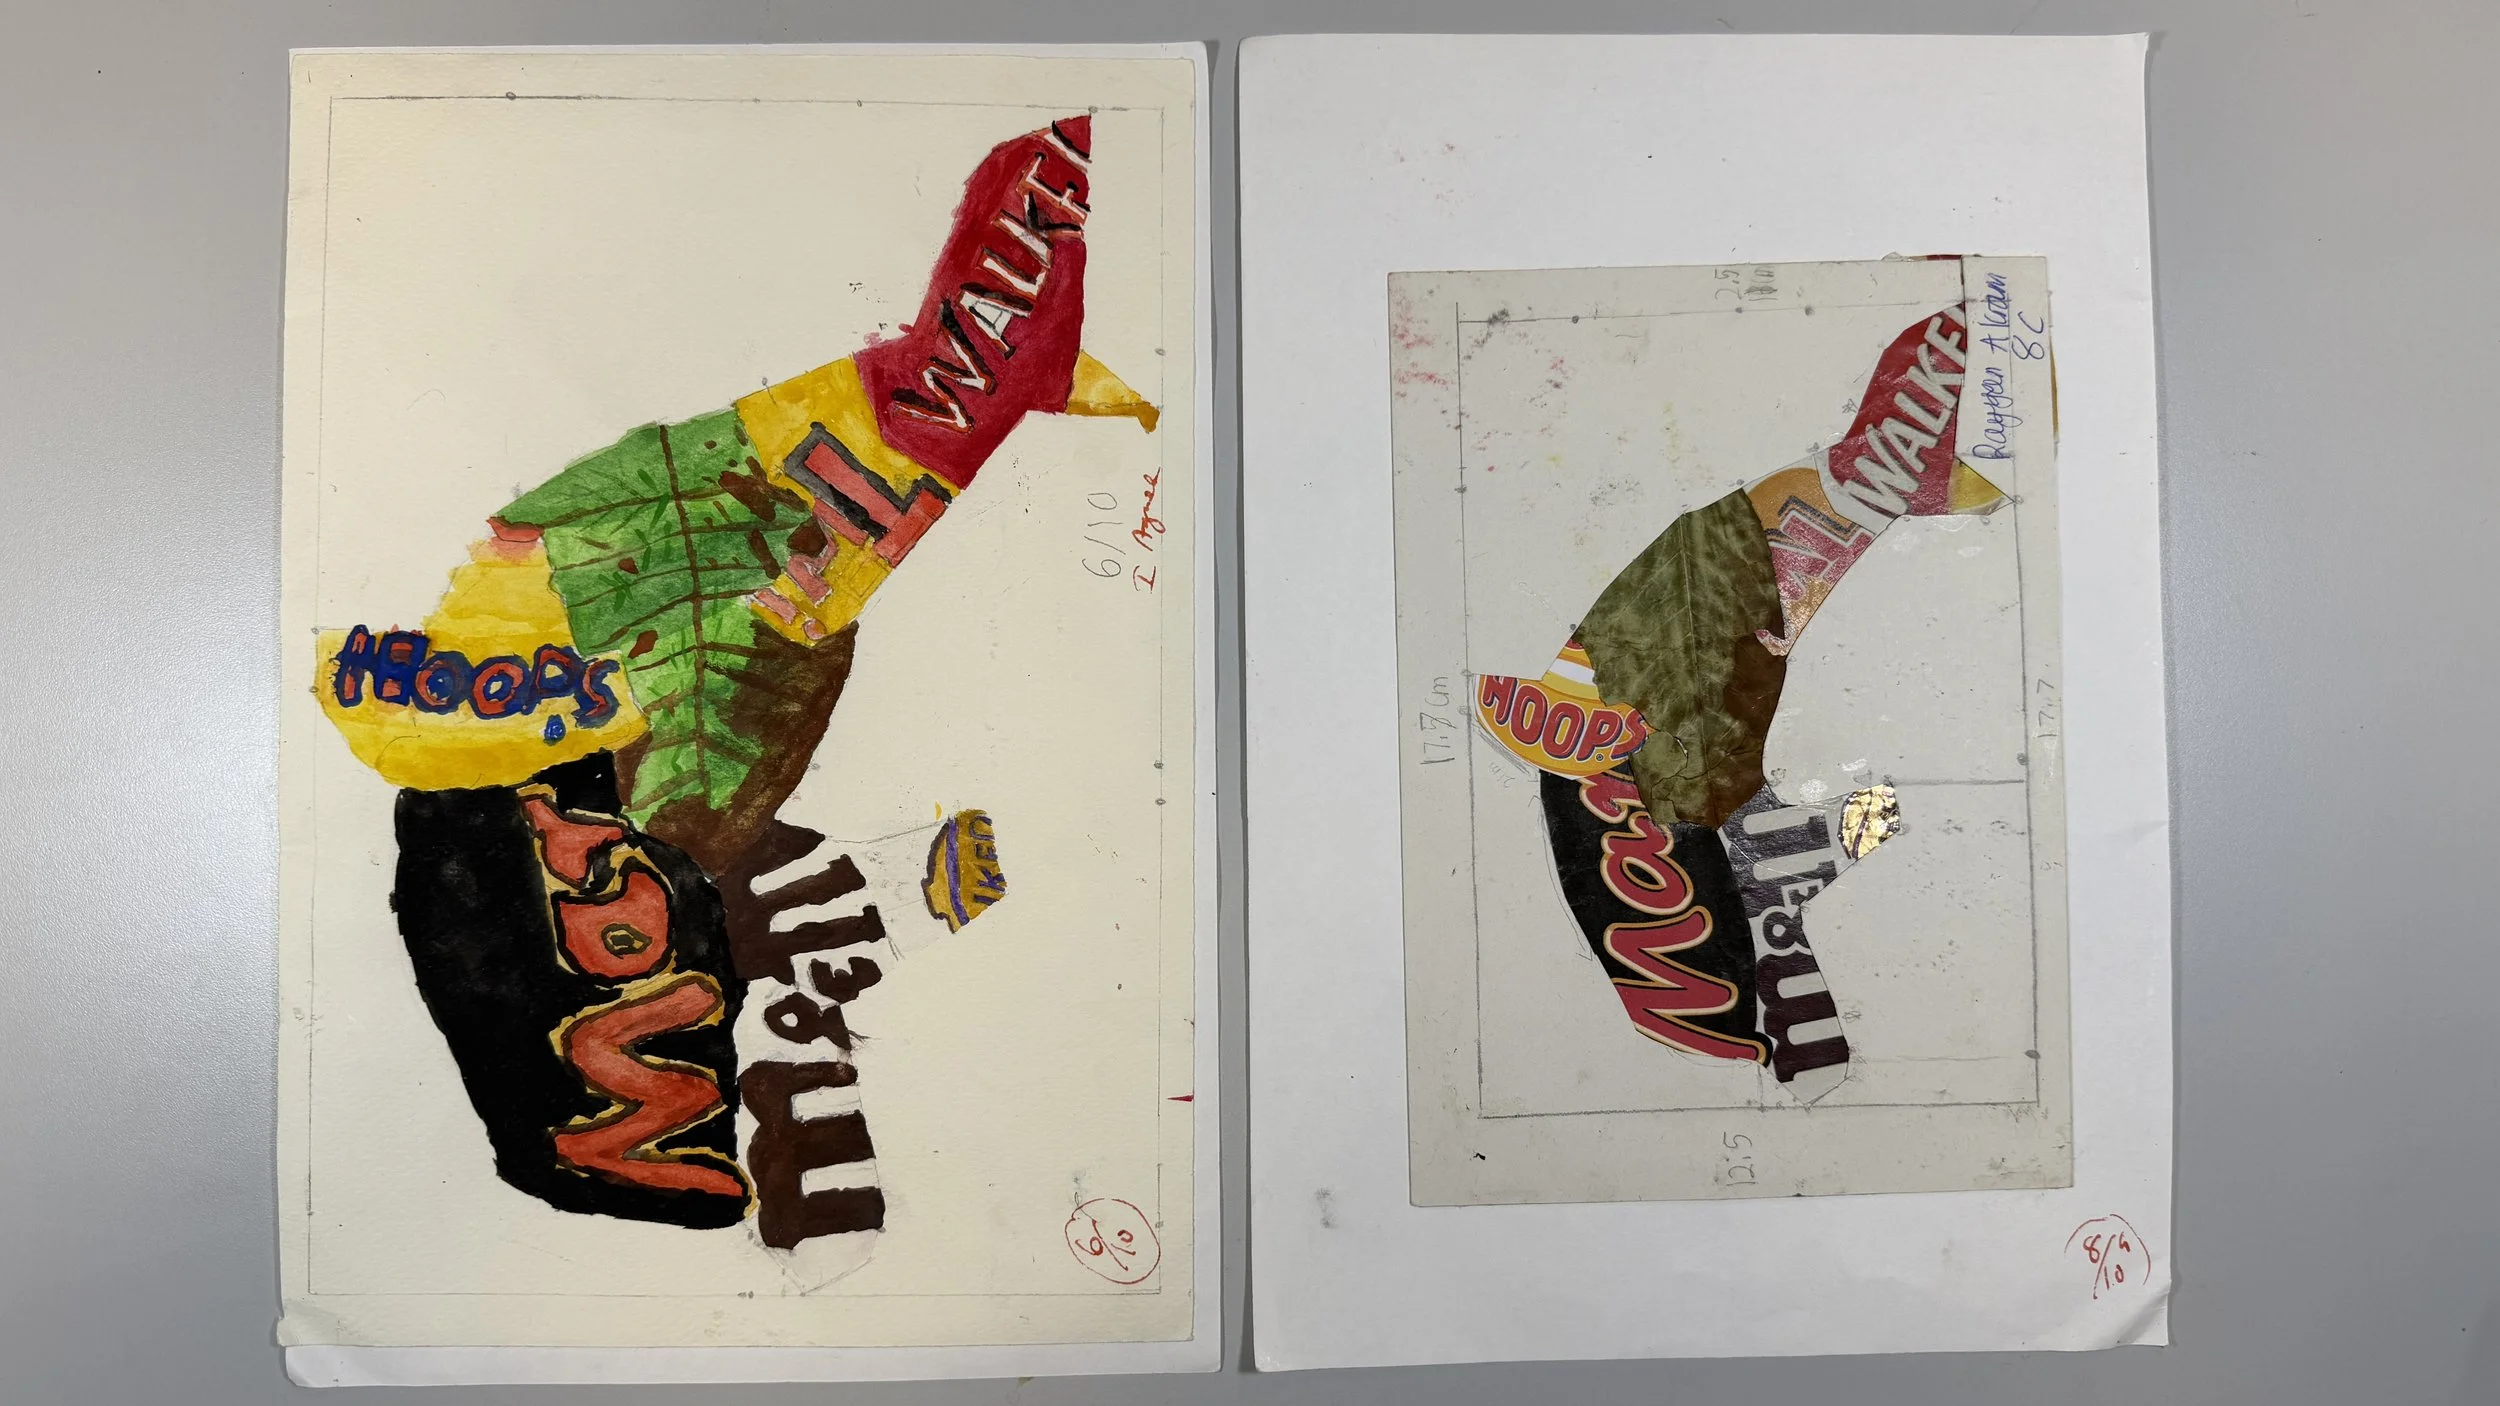
DEVELOPING EXAMPLE - Good effort at mixing and matching colours and the proportions of the underlying drawing are good, but more precision and control needs to be achieve in the painting to achieve a SECURE
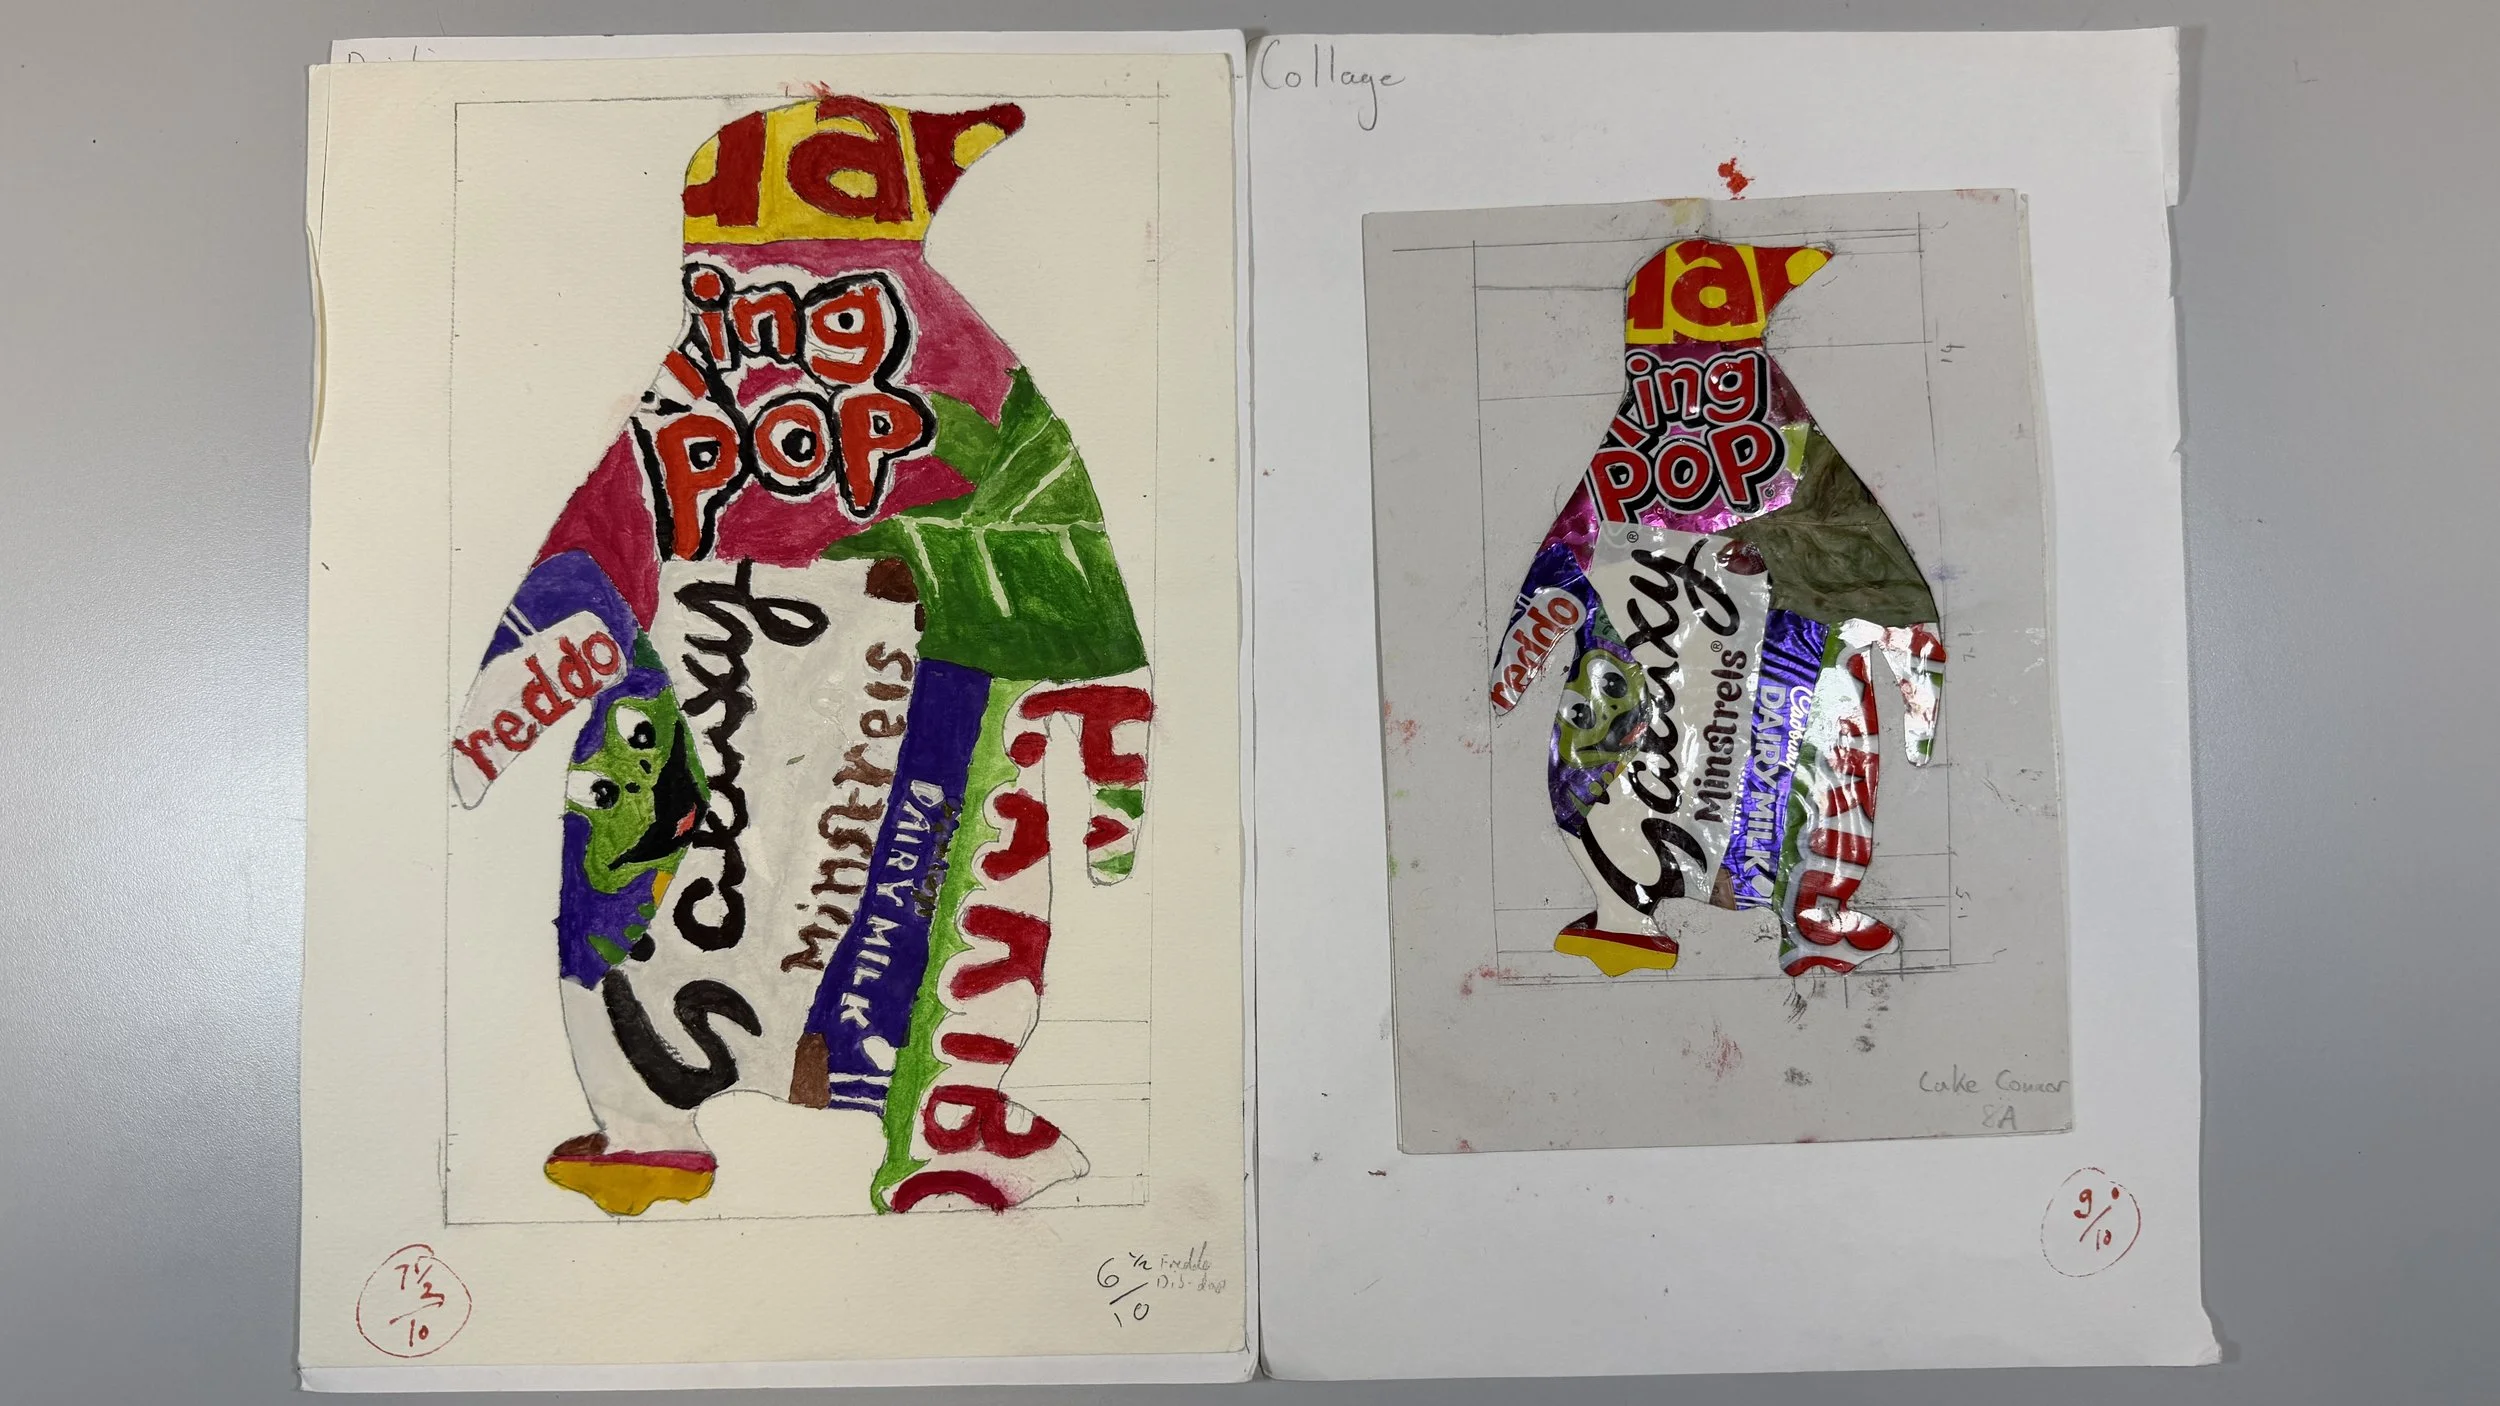
SECURE EXAMPLE - Good effort shown at all aspects of the work. Mixing and matching colours and the proportions of the underlying drawing are good, and there is evidence of good control in the painting.
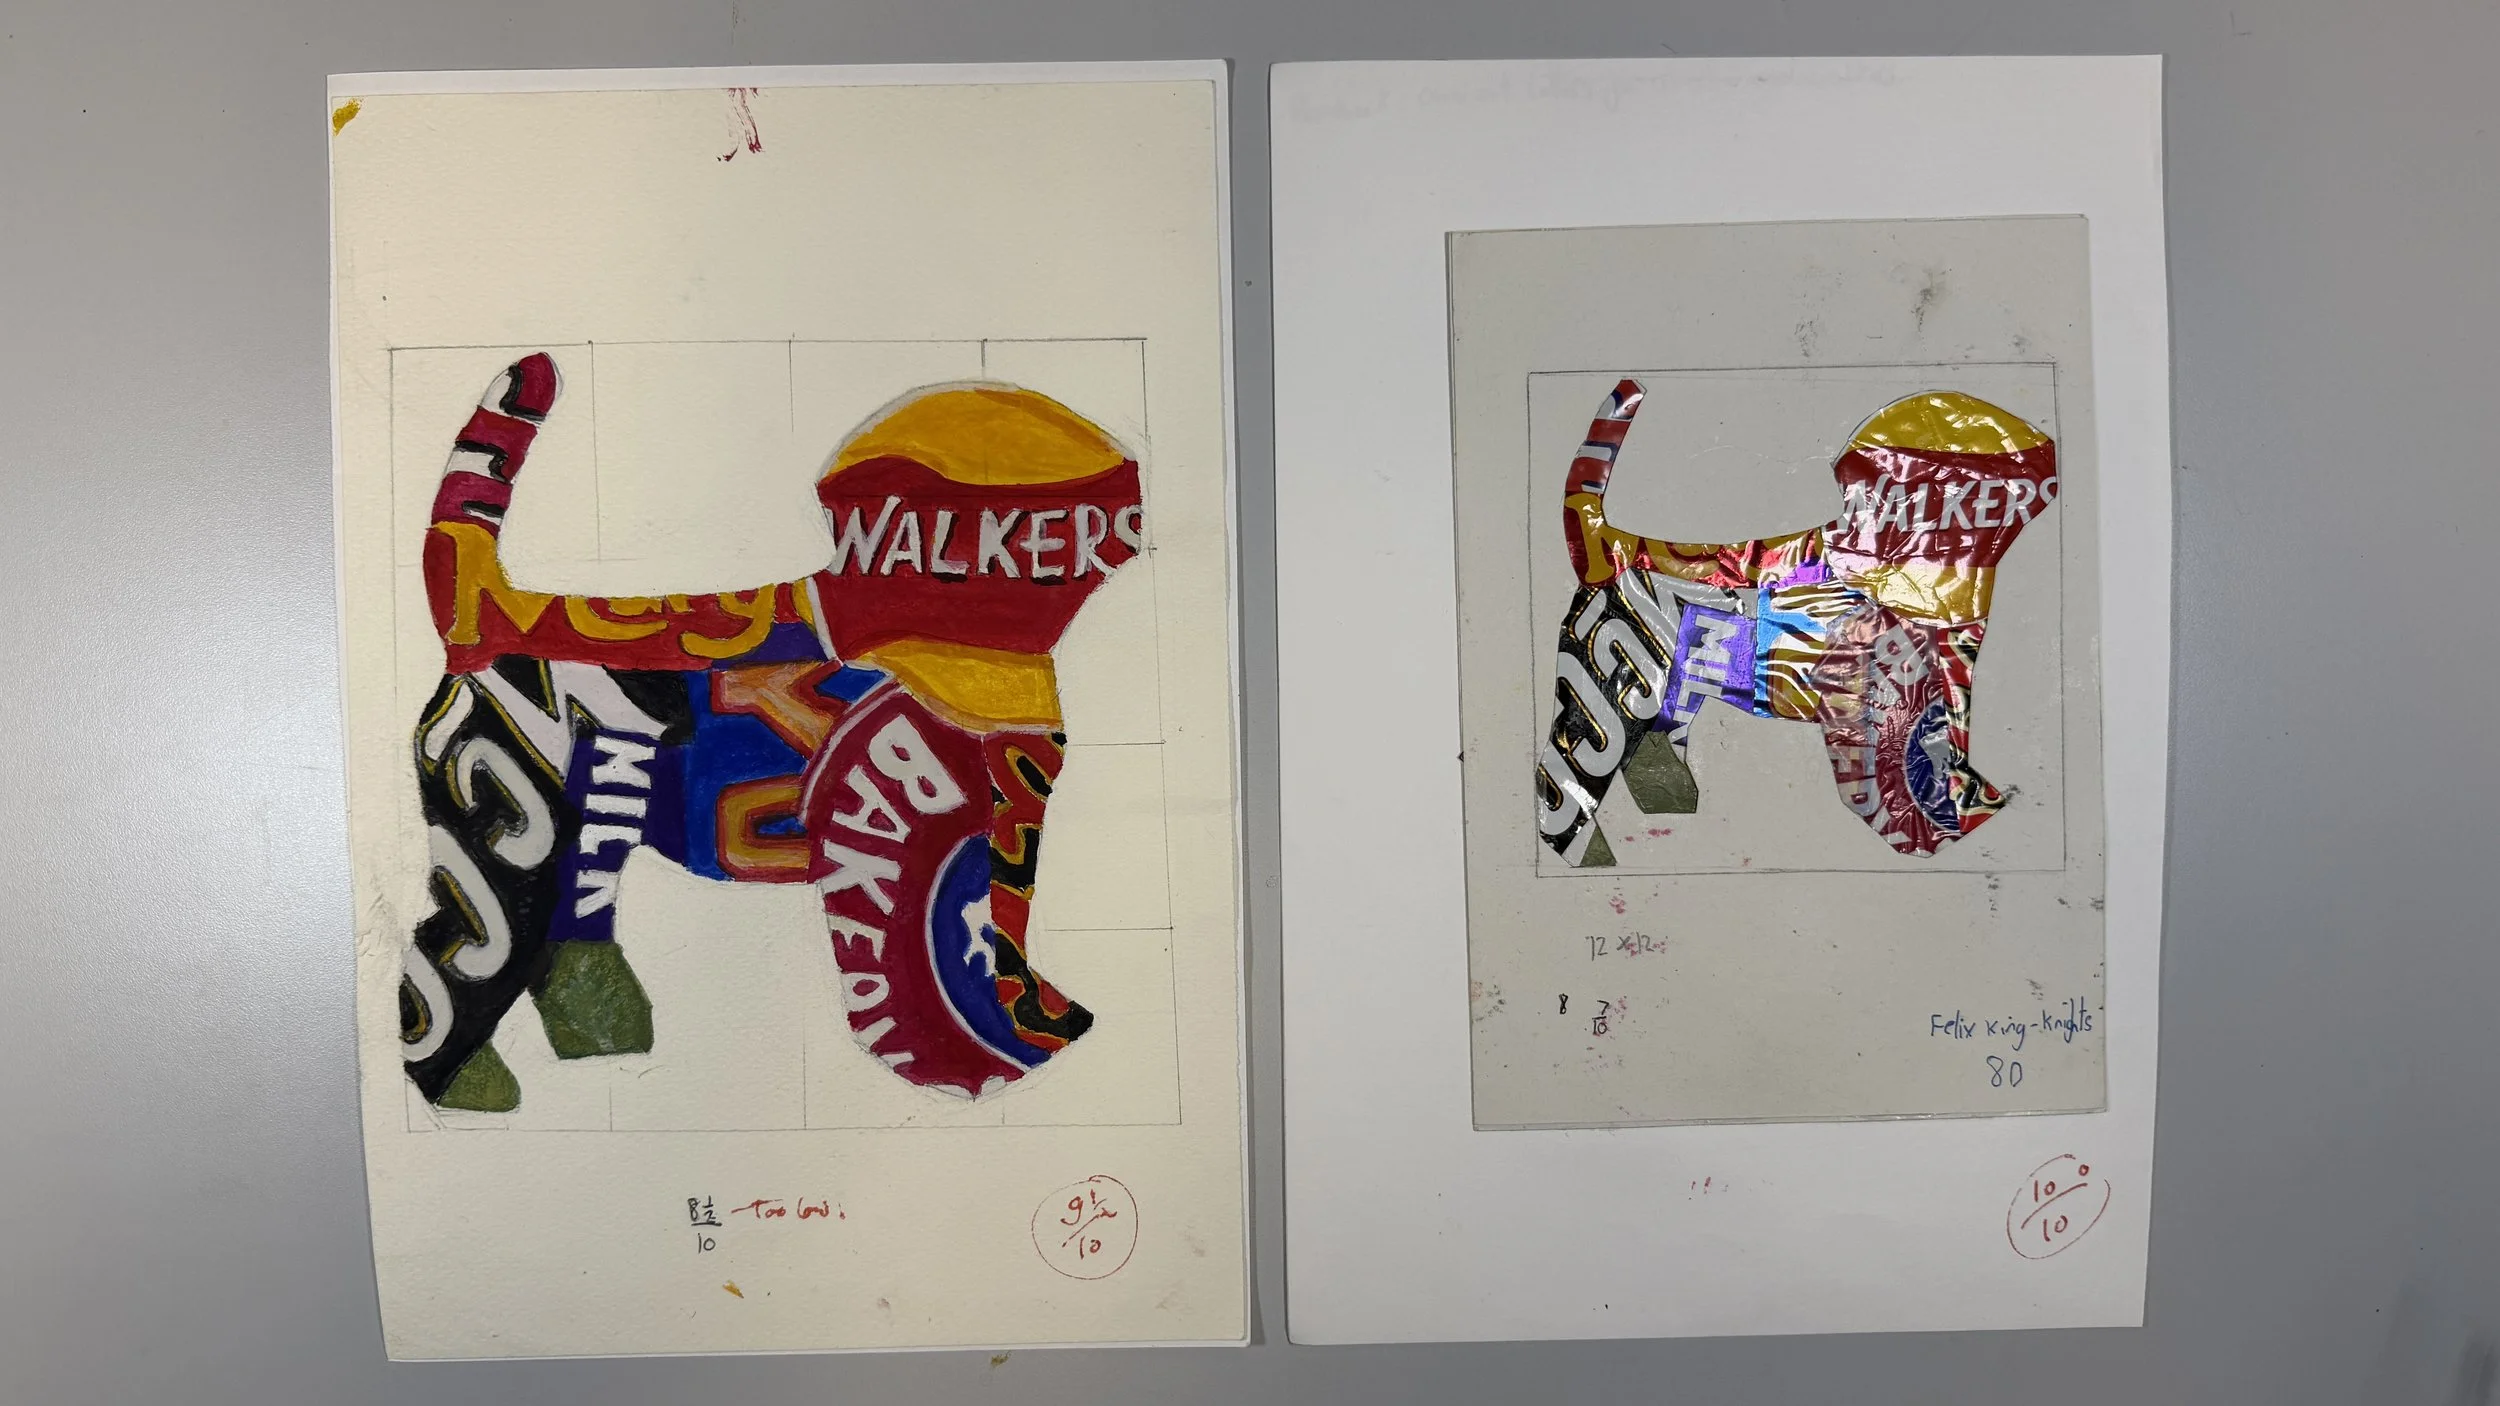
EXCELLENCE EXAMPLE - High quality work in all areas. Mixing and matching colours and the proportions of the underlying drawing are very good, and there is precision and control shown in the painting of all objects.
Homework : No homework as sketchbooks will be collected for assessment.