Year 7 - Portraiture and Clay Work Unit
( if you miss the lesson for any reason you should still complete both classwork and homework)
This unit of work is about:
Understanding the proportions of the human head
Improving and developing detailed drawing skills
Developing clay modelling skills
Recognising different artists’ portrait styles
UNIT ARTISTS: Jan Van Eyck, Leonardo da Vinci, Michelangelo, Albrecht Durer, Hans Holbein, Giuseppe Arcimboldo, Dego Velasquez, Frans Hals, Rembrandt van Rijn, Thomas Gainsborough, Jean Auguste Dominique Ingres, James Whistler, Vincent van Gogh, Edvard Munch, Henri Matisse, Pablo Picasso, Alberto Giacometti, Francis Bacon, Andy Warhol, Roy Lichtenstein, Chuck Close, Lucian Freud, David Hockney
UNIT VOCABULARY: Portraiture, Sculpture, Drawing, Line, Tone, Shading, Blending, Shading, Outline, Graded Pencils, Mechanical Pencil, Eraser, Stump, Portrait, Proportions, Profile, Gridded Enlargement
Clay, Sculpture, Modelling, Proportions, Slip, Kiln, Firing, Glaze, Ceramics
ASSESSMENT: Formative assessment with take place throughout the unit. Selected work will be assessed (the portrait worksheet, the facial features pencil drawings, the self-portrait drawing, the profile sketch, and the clay portrait sculpture) and there will be a summative assessment label completed for this Portraiture and Clay Work Unit of work.
Lesson 1
Classwork : Watch the Portrait Proportions Worksheet Guidance video below. Then produce a copy of the Portrait Proportions Worksheet. This will enable you to show an accurate understanding of the proportions of the human head and also show you can present the information in an accurate and precise way.
Remember the video demonstration shows that students do not need to copy the three skull drawings and skull written work.
Photographs will also be taken of students in readiness for the portrait clay sculpture.

Portrait Proportions Worksheet
Portrait Proportions Worksheet Guidance
The most common mistakes pupils make and loose marks are,
1. Not spending enough time doing an accurate heading and adding colour neatly
2. Not writing in pen and using guidelines
3. Getting the proportions of the head 'on the wrong lines'
4.Producing a sketch rather than an accurate 'line drawing'
Homework : Complete the Portrait Proportions Worksheet. Below are examples of completed worksheets so that students can judge the relevant standard of their work.

EXCELLENCE good proportions and accurate extra details (hair and ears), good presentation (guidelines used and a bold accurate and outlined heading)

EXCELLENCE- good proportions and accurate extra details (although chins no not quite line up), good presentation (guidelines used and a bold accurate heading)

SECURE+ good proportions and accurate extra details (but no ears), good presentation (heading could be bolder and outlined for an Excellence level)

SECURE good proportions but profile view lacks some accuracy, good presentation (guidelines used and a bold accurate )
Lesson 2 & 3
Classwork : Students will also be given a sheet of pictures of eyes, noses, mouths and ears (students with access to a printer may alternatively wish to collect their own pictures).
Watch the Drawing Facial Features Demonstration video. Split the next page in your sketchbook into four (as described in the video) and produce a highly detailed drawing of an eye. You are only drawing an eye this week.
Homework : Complete the eye drawing only. Also for those of you wanting to achieve an 11 or even a 12 out of 10, the Hyper-Realistic Eye Drawing video below shows you how.
Hyper-Realistic Eye Drawing video
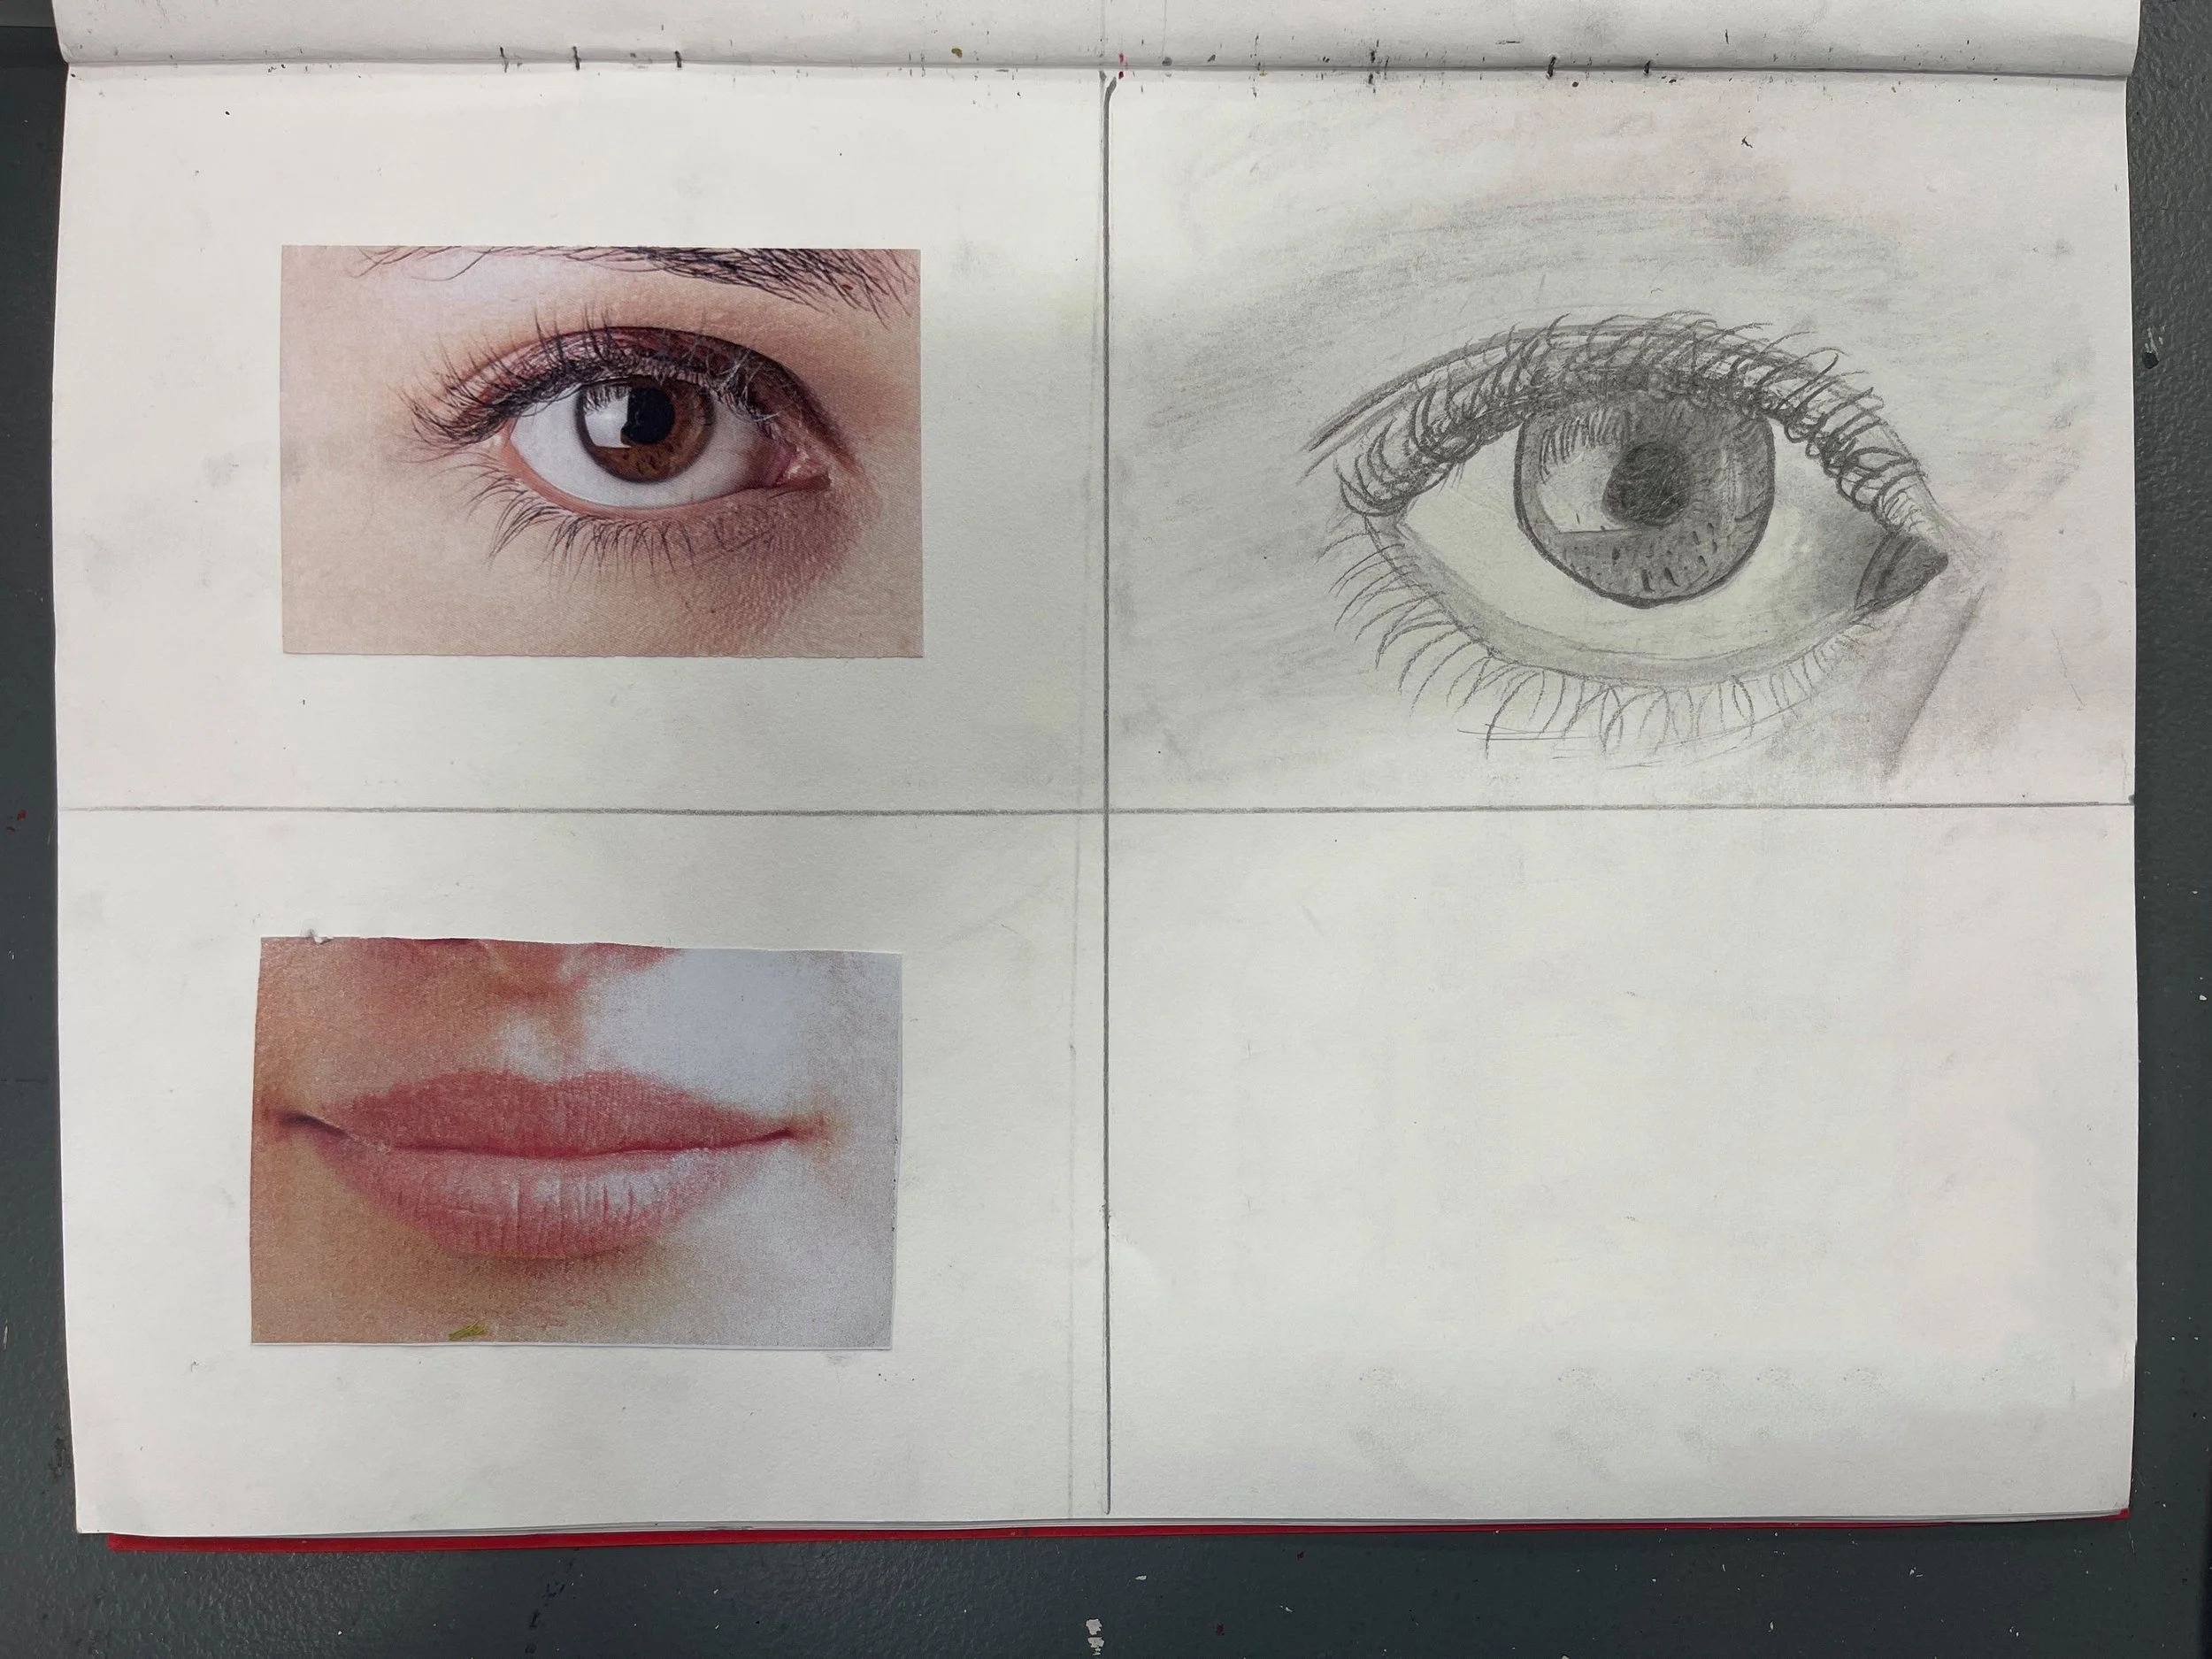
Mouth Drawing Demonstration Video

Homework : Stdents complete the mouth drawing over the Summer holidays if they did not manage to do this before the end of term.
START OF YEAR 8
Lesson 4
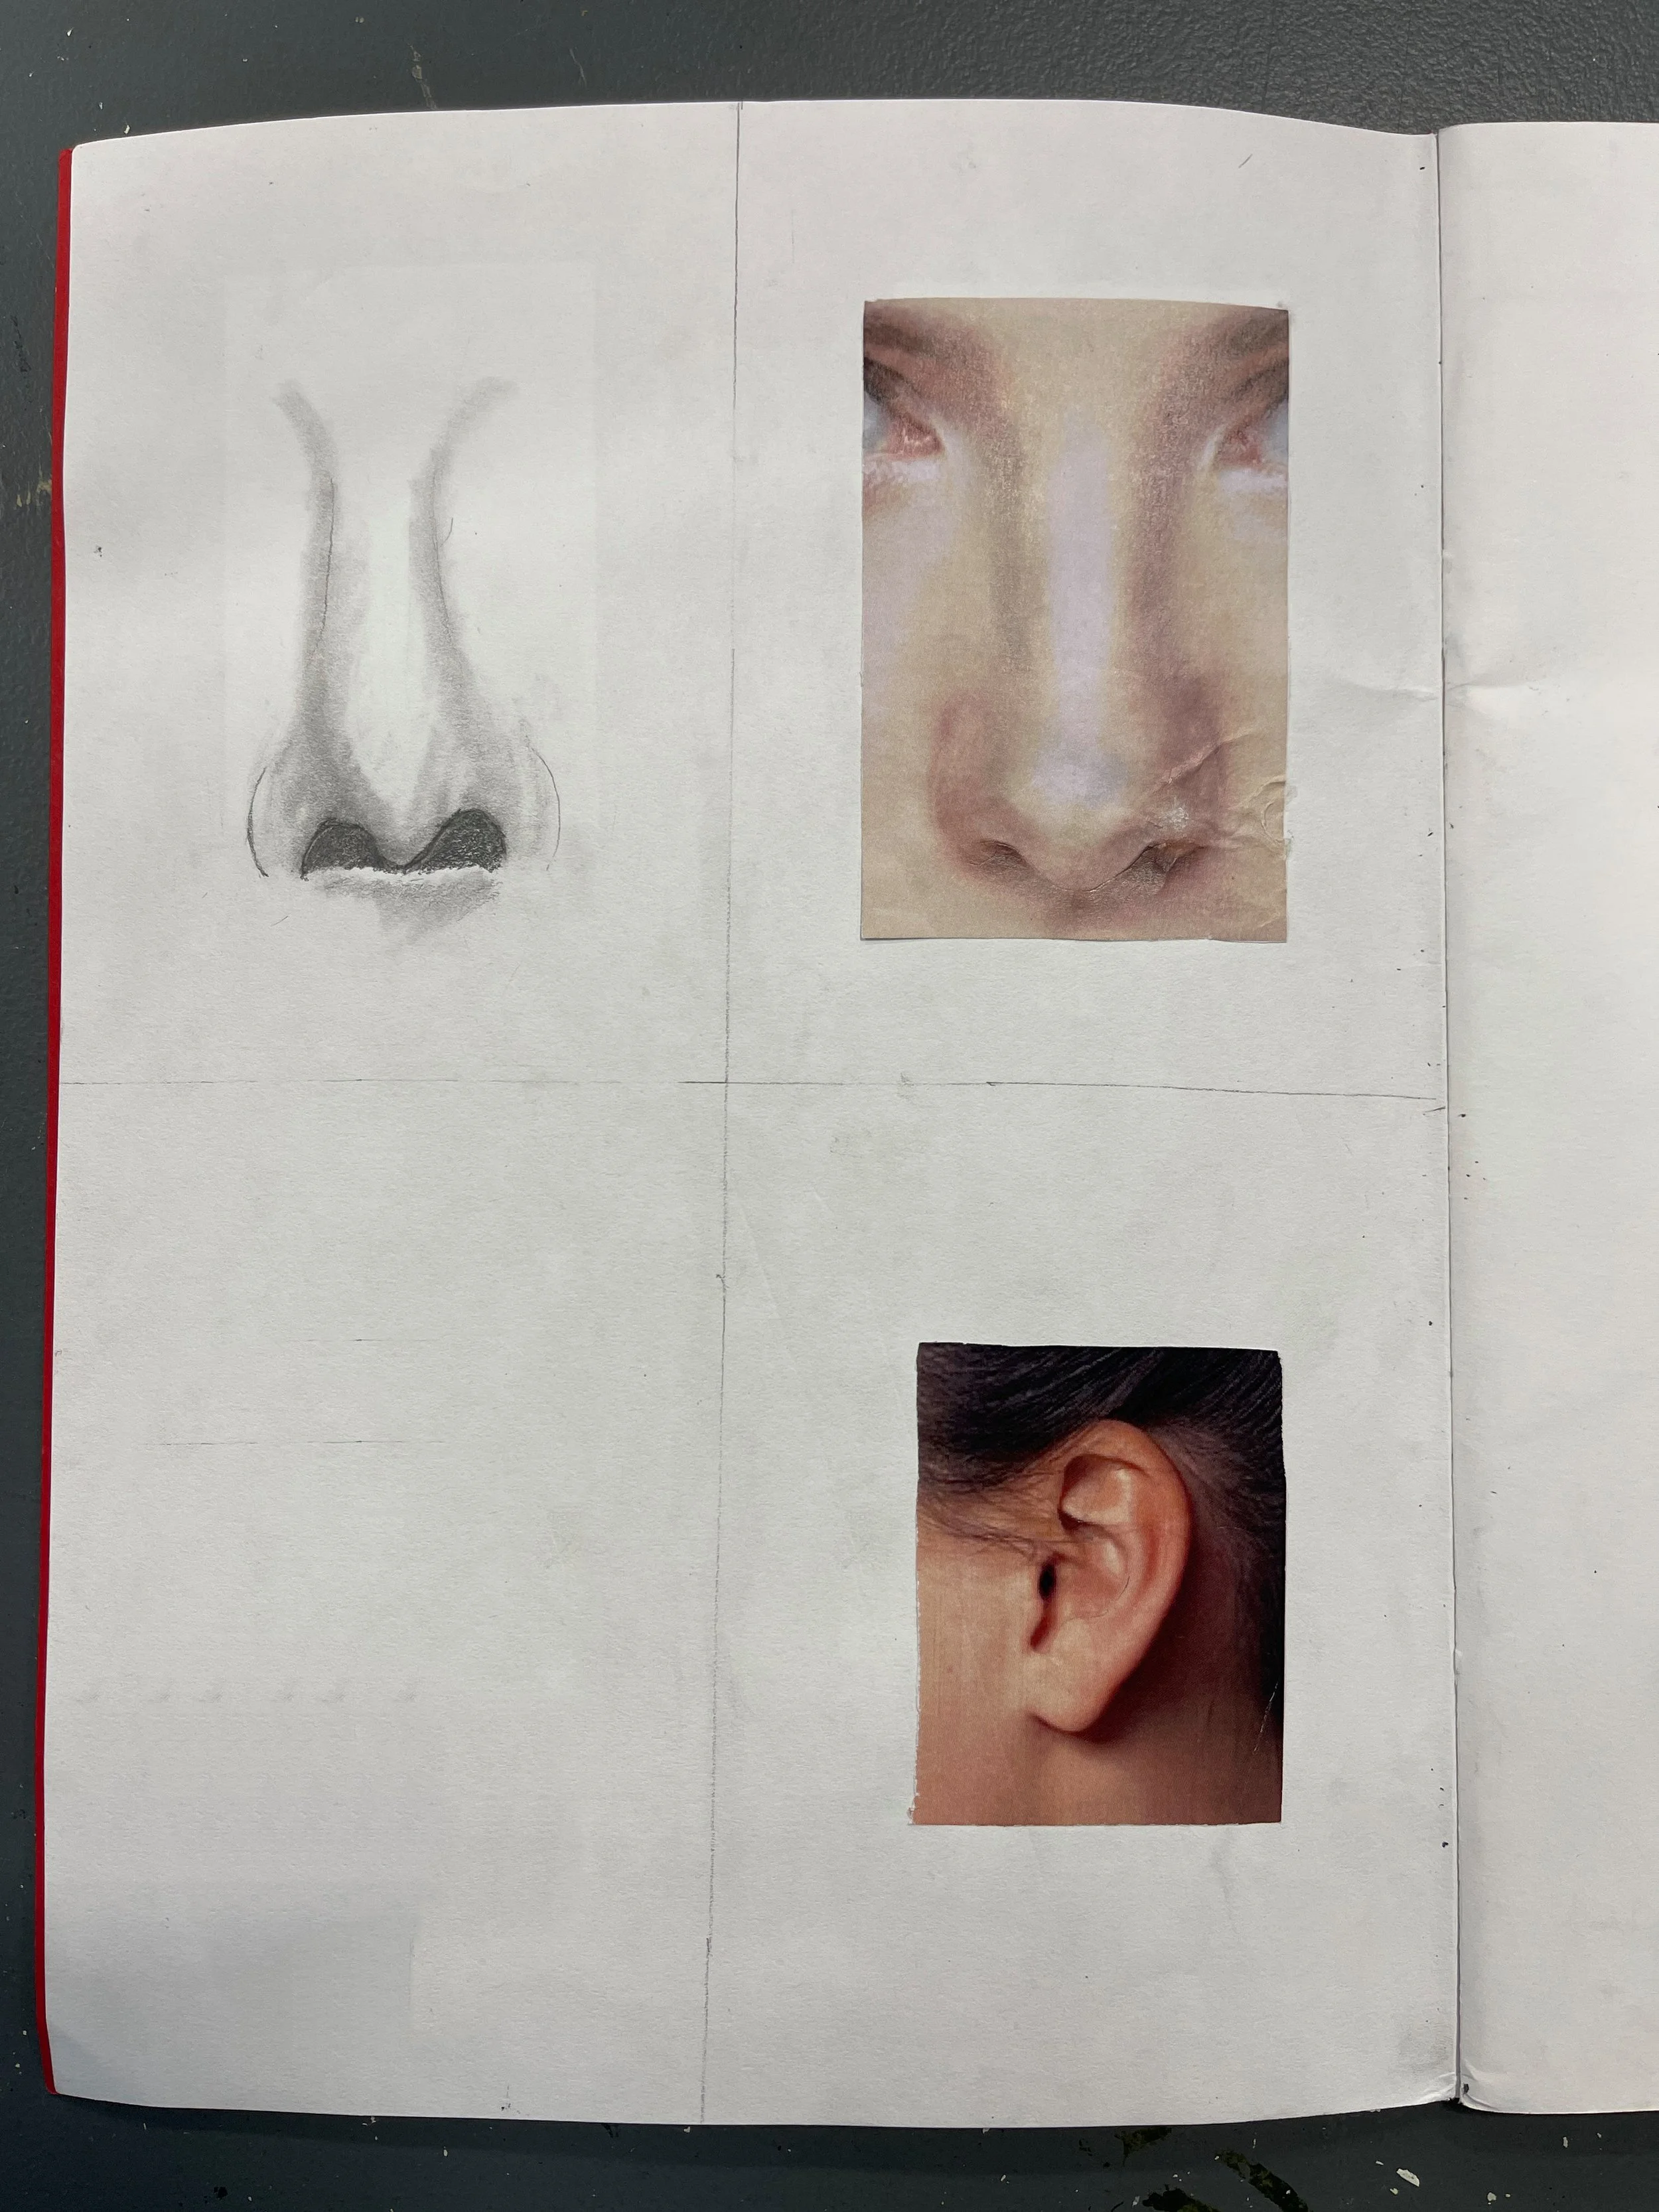
Use the first half of the lesson to re-introduce the Portraiture & Clay Work Unit of work started at the end of Year 7, also giving student some time to improve the quality of the Portrait Worksheet and eye and mouth drawings already completed.
Then show the Nose drawing demonstration video. Students then split the next page in the sketchbook into four (portrait this time) and produce a highly detailed drawing of a nose.
Nose Drawing Demonstration video
Homework : Complete the nose drawing.
Lesson 5
Students watch the Ear drawing demonstration video. Students then complete the ear drawing oin the same page as the nose drawing.
Ear Drawing Demonstration video

Homework : Complete the nose drawing.
Lesson 6
Classwork : Students are given photograph to stick in sketchbooks. They then watch the ‘Portrait Gridded Enlargement 1’ video and start to produce the outline of their self-portrait using the techniques described in the video.
Portrait Gridded Enlargement 1

Gridded enlargement self-portrait outline (no shading)
Homework : No homework this week as books will be collected for marking.
Lesson 7
Classwork : Students continue to produce the outline of their self-portrait using the techniques described in the video in Lesson 6.
Homework : Students should complete the gridded enlargement self-portrait outline (no shading). Students will also need to bring in a newspaper in readiness to start clay work next lesson. Students will also need to decide which of the 3 drawing styles show in Lesson 8 that they wish to use - they may also want to do some practice in the back of sketchbooks of the different styles of drawing.
NOTE : clay work can not be started next lesson unless the work described above is completed to an acceptable standard.
Lesson 8
Classwork : Students watch the ‘Portrait Pottery Sculpture 1’ video below (from the 3 min to 5 min 50 sec point). There is a discussion about working with clay, including classroom expectations and health & safety considerations.
The aim of this lesson is to model the basic shape of the head and eye sockets. The remainder of the lesson will be used to start the gridded enlargement drawing concentrating on the eyes, after deciding on which of the three drawing styles they wish is adopt - realistic pencil, pen scribble, or pen dots.
Portrait Pottery Sculpture 1
Homework : Students complete both eyes and eyebrows for their gridded self-portrait drawing. You will need to decide which of the 3 drawing styles show below that you wish to use,
REALISTIC TONAL ‘PENCIL’ DRAWING (2 example videos):
Note - there are more episodes in this series that will be helpful
‘PEN’ SCRIBBLE DRAWING (2 example videos):
‘PEN’ DOT DRAWING (2 example videos):
NOTE : clay work can not be continued with next lesson unless the work described above is completed to an acceptable standard. The eyes and eyebrows of the drawing
Lesson 9
Classwork : Students watch the ‘Portrait Pottery Sculpture 2’ video below.
The aim of this lesson is complete modelling the eyes and perhaps start the nose. The last 10 minutes of the lesson will be used to started drawing the mouth and nose for the gridded enlargement portrait.
Portrait Pottery Sculpture 2
Homework : Students complete the mouth, nose and the surrounding skin for their gridded enlargement self-portrait drawing.
NOTE : clay work can not be continued with next lesson unless the work described above is completed to an acceptable standard. The assessment example videos below are extremely useful in helping students to achieve higher quality work.
Lesson 10
Classwork : Students aim to complete modelling the the nose and mouth. The last 10 minutes of the lesson will be used to started drawing the remainder of the skin and hair for the gridded enlargement portrait.
Homework : Students complete all aspects of the gridded enlargement except the clothing.
NOTE : clay work can not be continued with next lesson unless the work described above is completed to an acceptable standard.
Lesson 11
Classwork : Students aim to complete modelling all aspects of the face including the cheeks, chin and eyebrows. The ears and hair can be left until next lesson. The last 10 minutes of the lesson will be used to started drawing the clothing for the gridded enlargement portrait.
Homework : Students complete all aspects of the gridded enlargement including the clothing, making sure the blazer is shading dark enough.
NOTE : clay work can not be continued with next lesson unless the work described above is completed to an acceptable standard.
Lesson 12
Classwork : Students watch the ‘Portrait Pottery Sculpture 3’ video below.
The aim of this lesson is to improve all aspect of the completed feature for the clays sculpture and to start modelling the ears and hair and any other facial details like glasses. The lesson should also be used to encourage students to take their clay work home to complete, showing the Gargoyle Clay Sculpture - Extension work video below (from the 2mins 30sec point) on how to make ‘slip’ at home. They already have a box but will need extra clay and some dry clay to make ‘slip’. Students may take home one clay modelling tool but not a knife.
Portrait Pottery Sculpture 3
The lesson should also be used to discuss the high quality examples shown below, as well as the homework option for students to take their clay sculpture home to work on.

EXCELLENCE - Great overall modelling skills, including smooth blending of the clay and details (although the sculpture on the right doesn’t look as good in the picture as in real life)

EXCELLENCE - Excellent modelling, smooth blending of the clay, and excellent hair and moustache detail

EXCELLENCE - Very good modelling, great hair work and smooth blending of the clay good enough for excellence

SECURE+ - Good modelling and smooth blending of the clay, needs a little more detail in the hair and lips for an excellence

SECURE+ - Good modelling, although the noses are a little big and hair could be more detailed

SECURE - Good modelling, although the eyes look a little close together, and most of the facial feature could have a little more detail
Homework : Next lesson is the last lesson for clay work so students may wish to take their clay sculpture home to work on. They already have a box but will need extra clay and some dry clay to make ‘slip’. Students may take home one clay modelling tool but not a knife. See the video below (from the 2mins 30sec point) on how to make ‘slip’ at home.
Lesson 13
Classwork : This is a DIRT lesson when students aim to complete or improve modelling the clay sculpture, including the hair, ears and other facial details. It may be advisable for some students to re-watch the ‘Portrait Pottery Sculpture 3’ from Lesson 12.
When students have completed the clay sculpture they should use the time to improve any of the sketchbook work for this unit .
The last 15 minutes of the lesson can be use to complete the ‘Portraiture & Clay Work Evaluation Sticker’, and also to introduce the next ‘Collage/Painting Project Unit’.

Collage Painting Introduction
Homework : Books will be collected for marking but students will need to collect items for the collage. They should have the following,
2 animal silhouettes printed on A4 paper (so each are approx. A5 size)
6-8 man-made objects (sweet packets and wrappers with big lettering) - this year student will stick down just 3 man-made objects
2-3 natural objects (such as leaves) - this year students will stick down just 1 natural object
Remember you must draw and paint whatever it is you collect and stick down as part of your collage.