Year 7 - Drawing Unit
( if you miss the lesson for any reason you should still complete both classwork and homework)
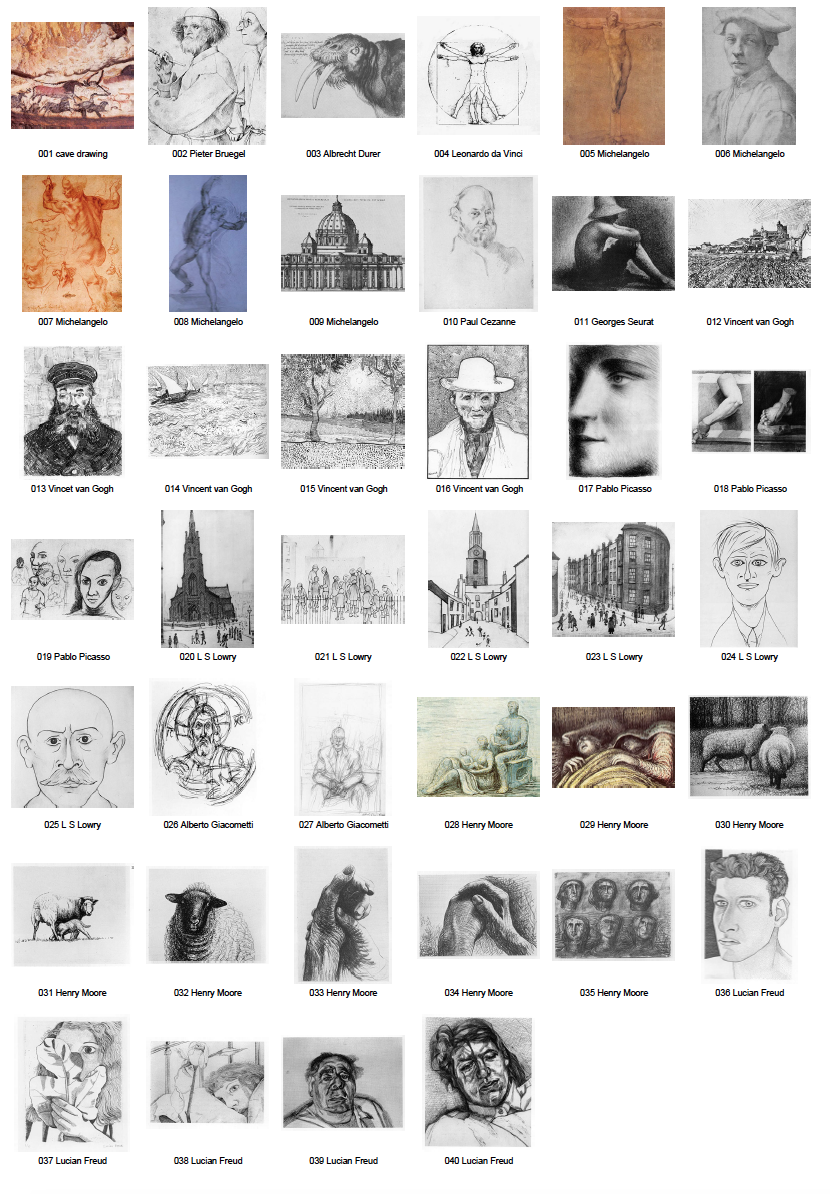
UNIT ART & ARTISTS: Cave drawing/paintings, Bruegel, Leonardo da Vinci, Michelangelo, Cezanne, Seurat, Van Gogh, Picasso, Lowry, Giacometti, Moore, Freud
UNIT VOCABULARY: Drawing, Mark-making, Line, Tone, Shading, Cross-hatching, Blending, Shading, Pattern, Ellipse, Texture, Outline
Lesson 1
Classwork : Introduction of Art at St Ambrose College. Pupils are issued a sketchbook and expectations, equipment and homework are discussed. Pupils also complete a baseline questionnaire of their prior experiences and knowledge of Art.
Starting a new Sketchbook video
Homework: On the first page of you sketchbook produce a freehand (no using a ruler or compass) pencil drawing of an apple and half and orange. Work about life size and add shading (but not colour). Spend as much time as you think you need in order to do your best.
Lesson 2
Classwork : Watch the ‘Mark Making Exercise’ video below. Split the third page in sketchbooks into 16 equally sized boxes. Follow the video to complete the first 8 boxes.
Mark Making Exercise
Homework: Complete the 16 boxes for the Mark Making Exercise. Remember to watch the Mark Making demonstration video. Listen very carefully to the instructions on the last 8 marks/boxes you have to make up yourself.
Lesson 3
Classwork : Watch the ‘Artist’s Drawing Copy’ video below. Use the photocopy of the Vincent’s Van Gogh’s drawing show in the video (you have been given this) to copy. Use a ruler and measurements as described in the video.
Artist's Drawing Copy

Hat completed (almost!) and face outline
Homework: Finish drawing the hat and all hat details, and also complete the outline of the face (but no fine details) as show in the picture above.
Lesson 4
Classwork : The ‘Artists’ Drawings Test Recognition Handout’ should be stuck onto the second page in your sketchbook next to the ‘Mark Making Exercise’. Students watch the ‘Artists Drawings Slide Show’ video below and make notes on the handout about the different artists. The lesson will also be used to explain the major homework task.
Artists’ Drawings Slide Show
Artists’ Drawings Test Recognition Handout
Homework: Watch the ‘Artists’ Drawings Research Task’ video below. Use the ‘Artists’ Drawings Research Handout’ to complete the research work explained in the video. This is a major homework task and probably the one piece of homework this term that will take the most time to complete. There are 7 artists on the ‘Artists’ Drawings Research Handout’. Student need to complete research task on just 4 of the artists.
Artists’ Drawings Research Task

Artists’ Drawings Research Handout
Lesson 5
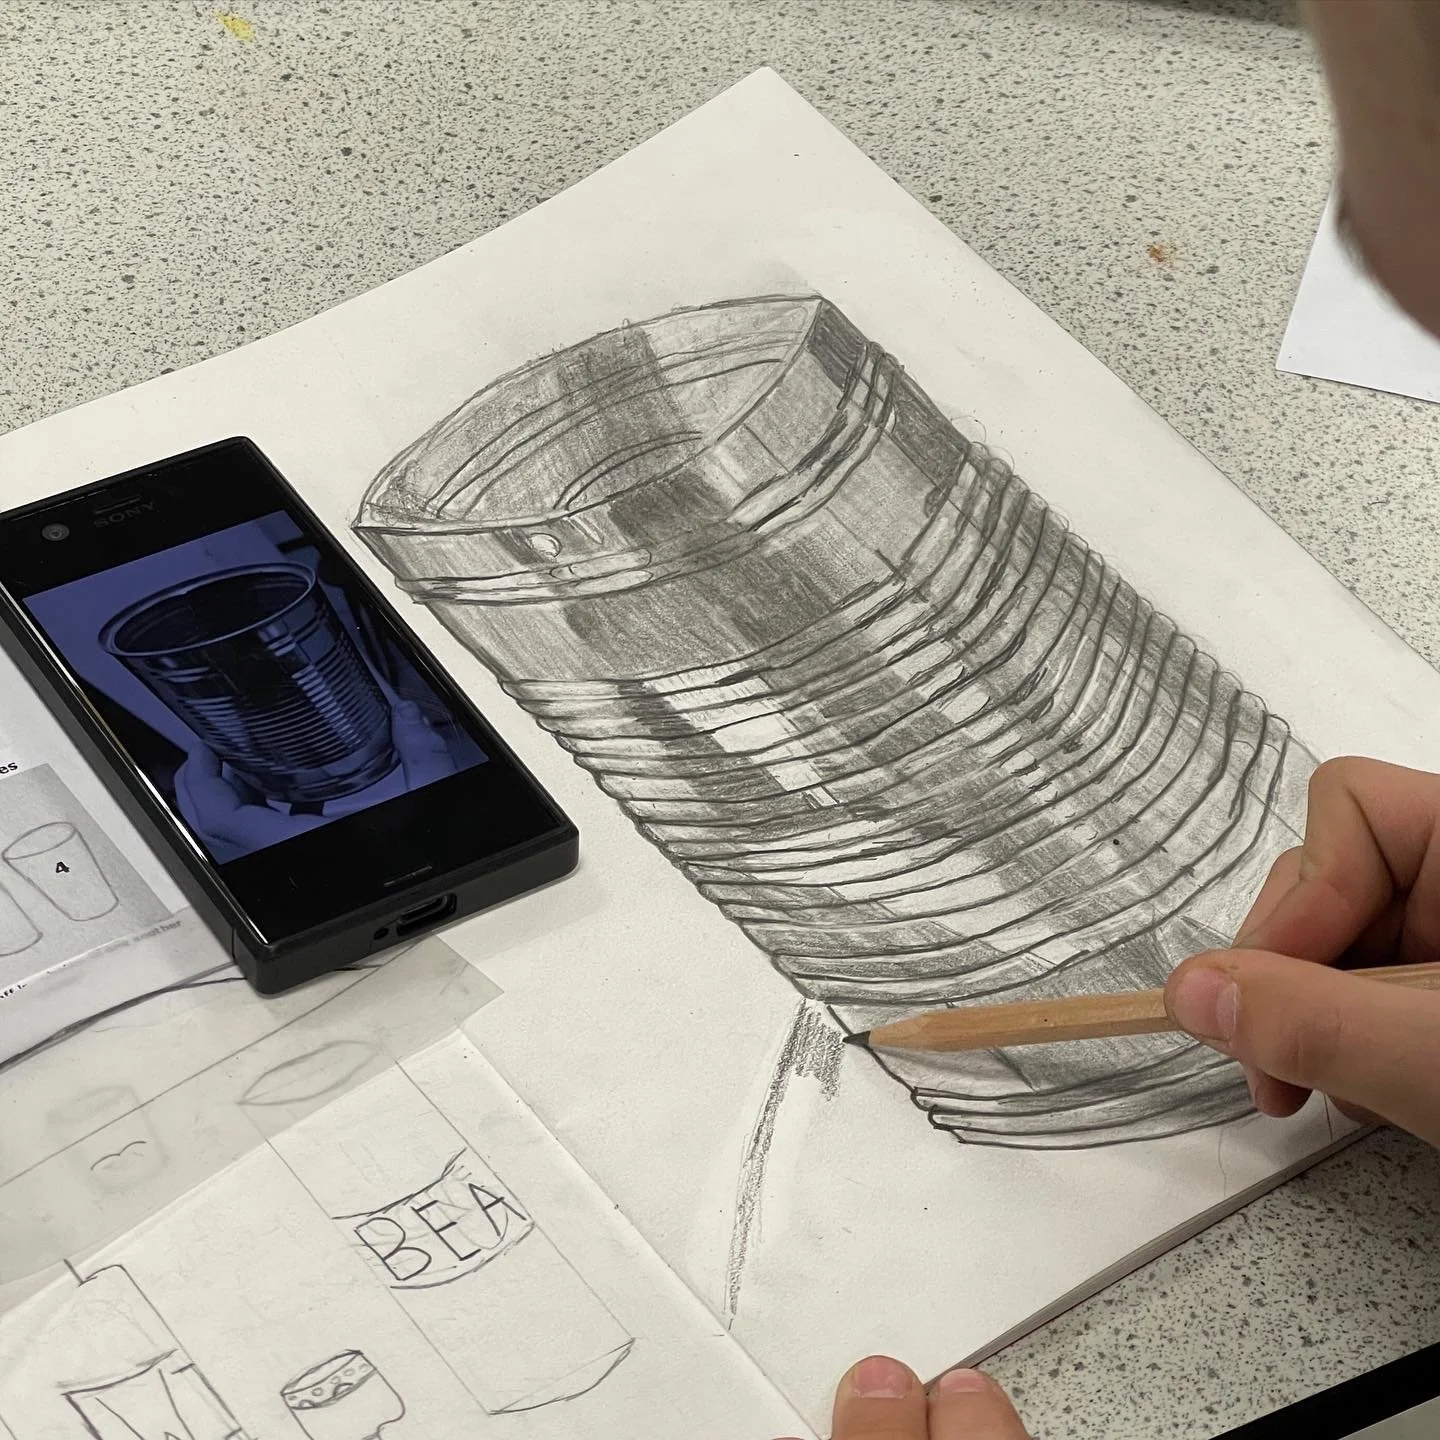
Classwork : Continue to work on the artists’ drawing copy of the Van Gogh portrait. Students should be working on the detail of the face in lesson (some students may even start the scarf). Students can take a photo of the Van Gogh drawing on their phone; in this way they can zoom in on the picture in order to see the fine details/marks more clearly. Finally trim and stick the Van Gogh picture into sketchbooks next to the drawing.

Homework : There is no homework. Books will be collected to mark. Students must again bring in their drawing equipment next lesson.
Lesson 6
Classwork : Watch the ‘Tin Can 1 Outline’ video below up to 6mins 10 secs.
Tin Can Outline 1
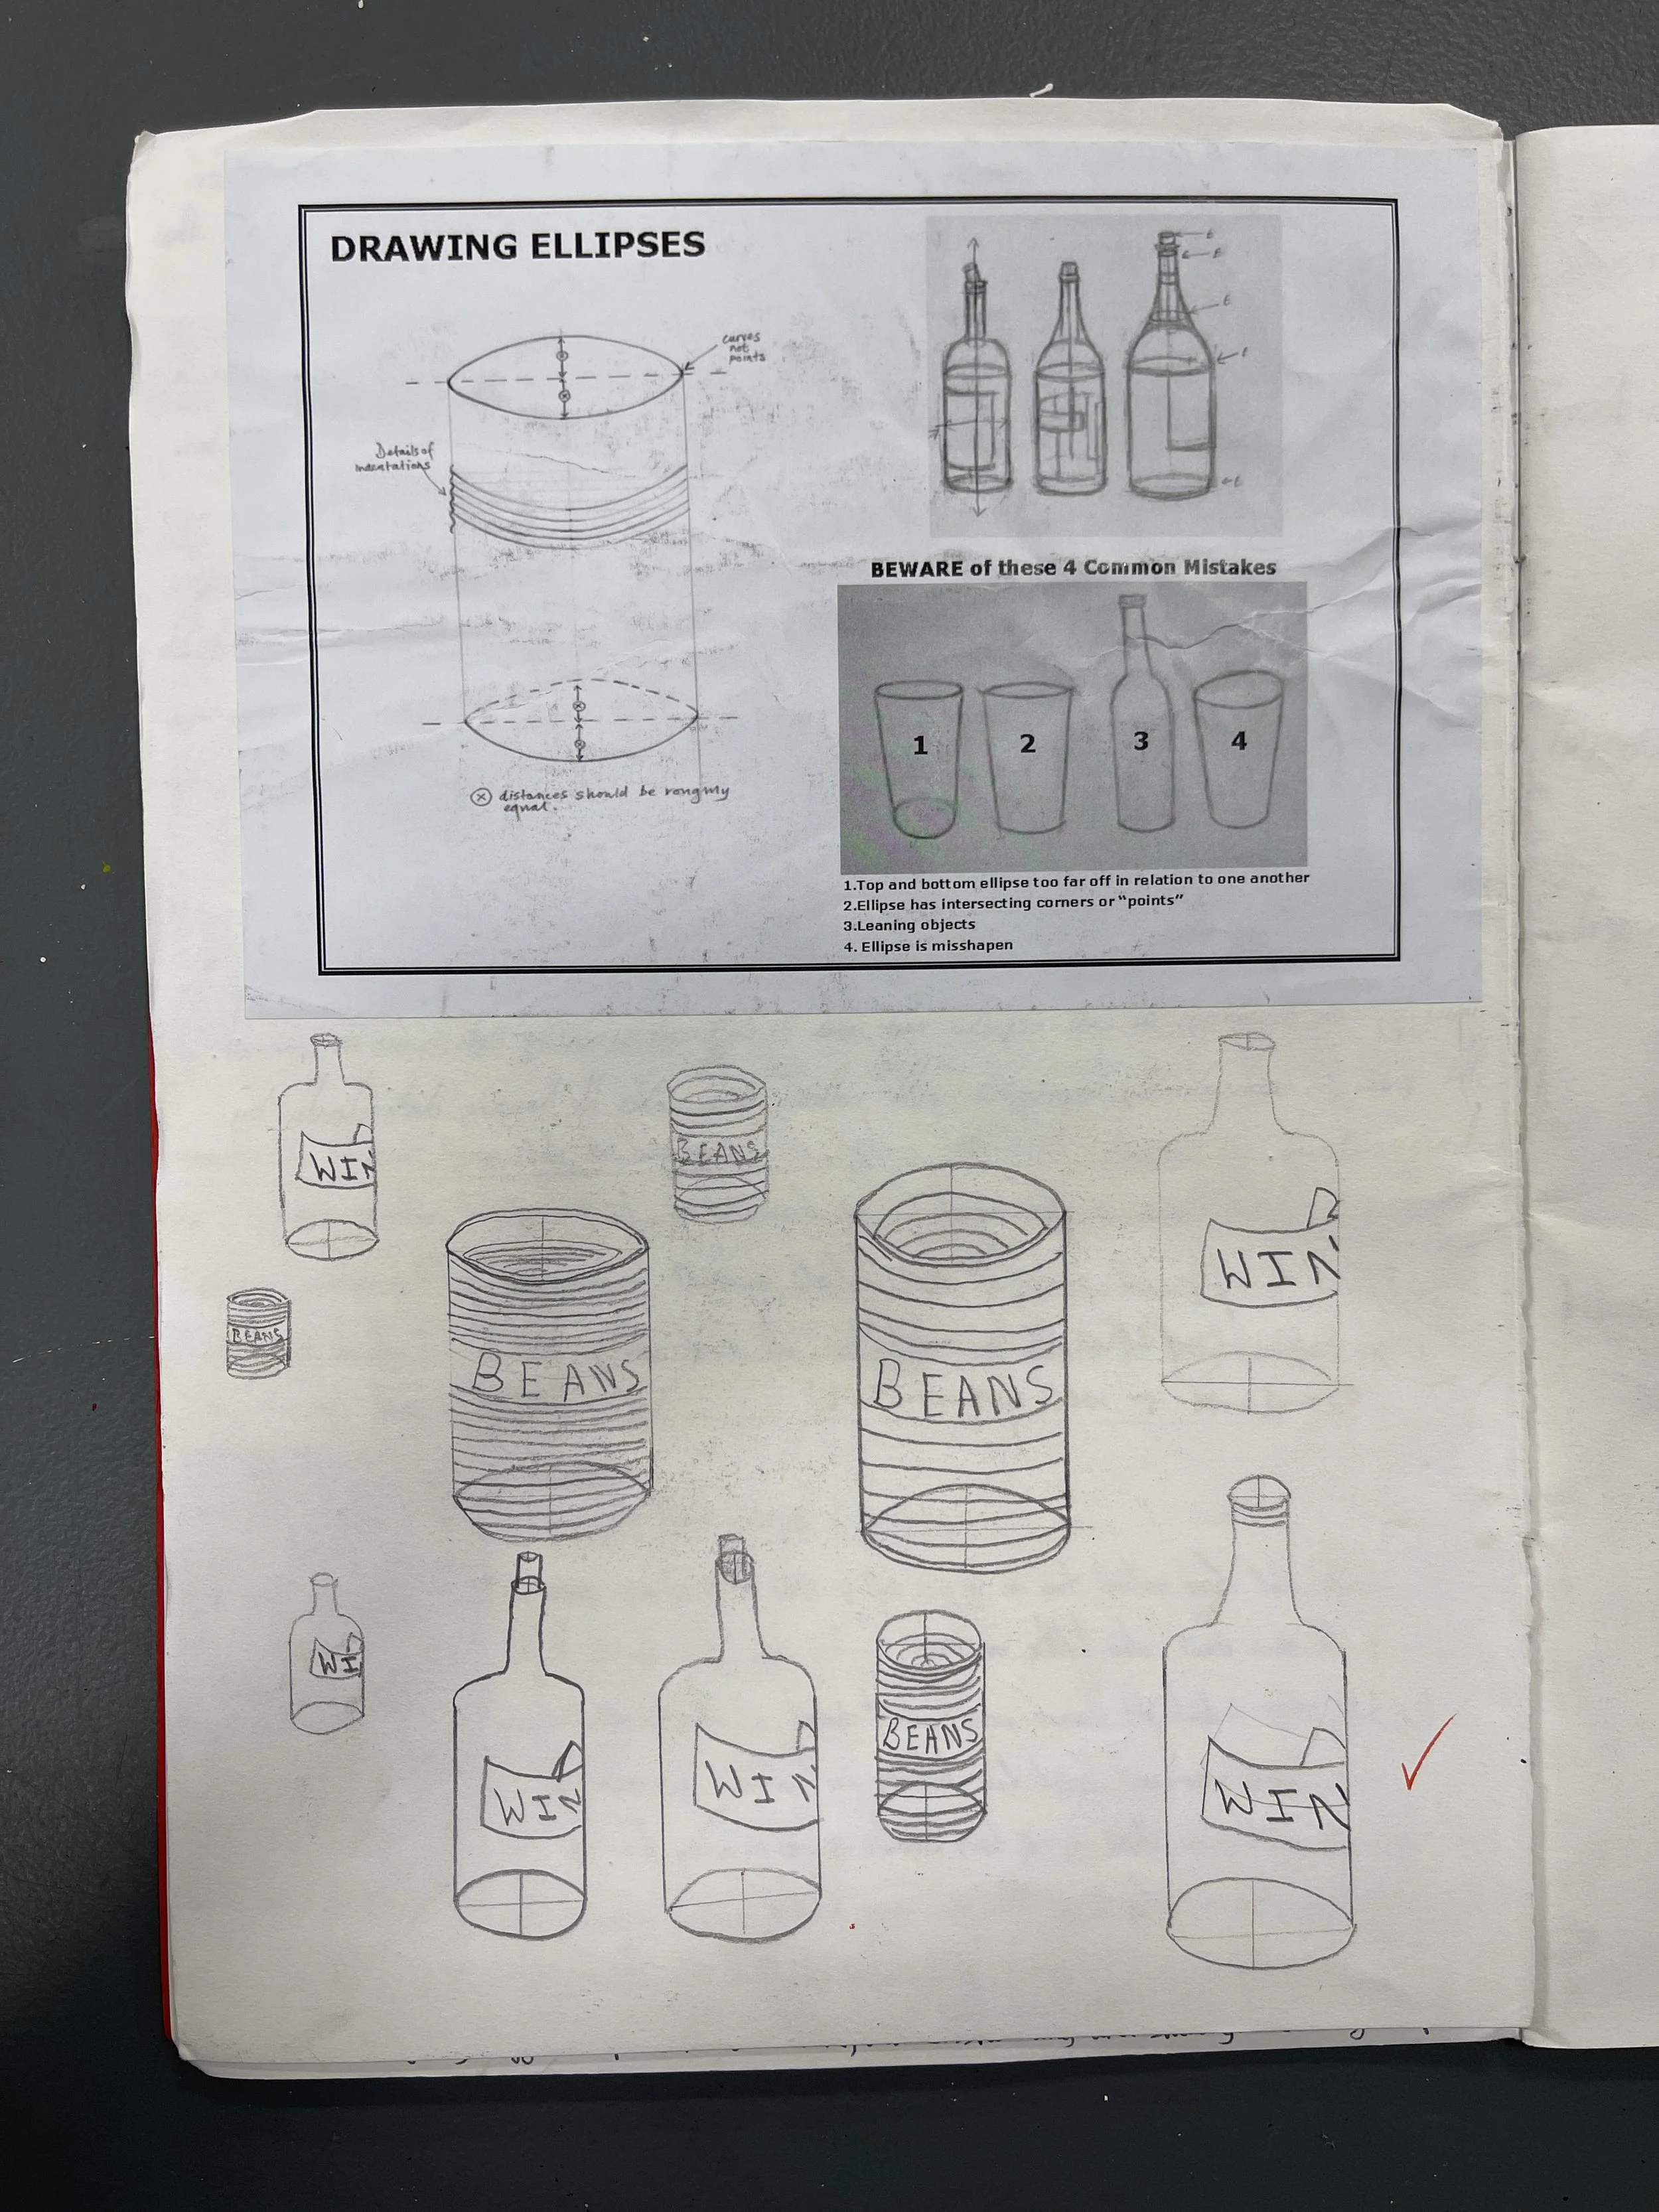
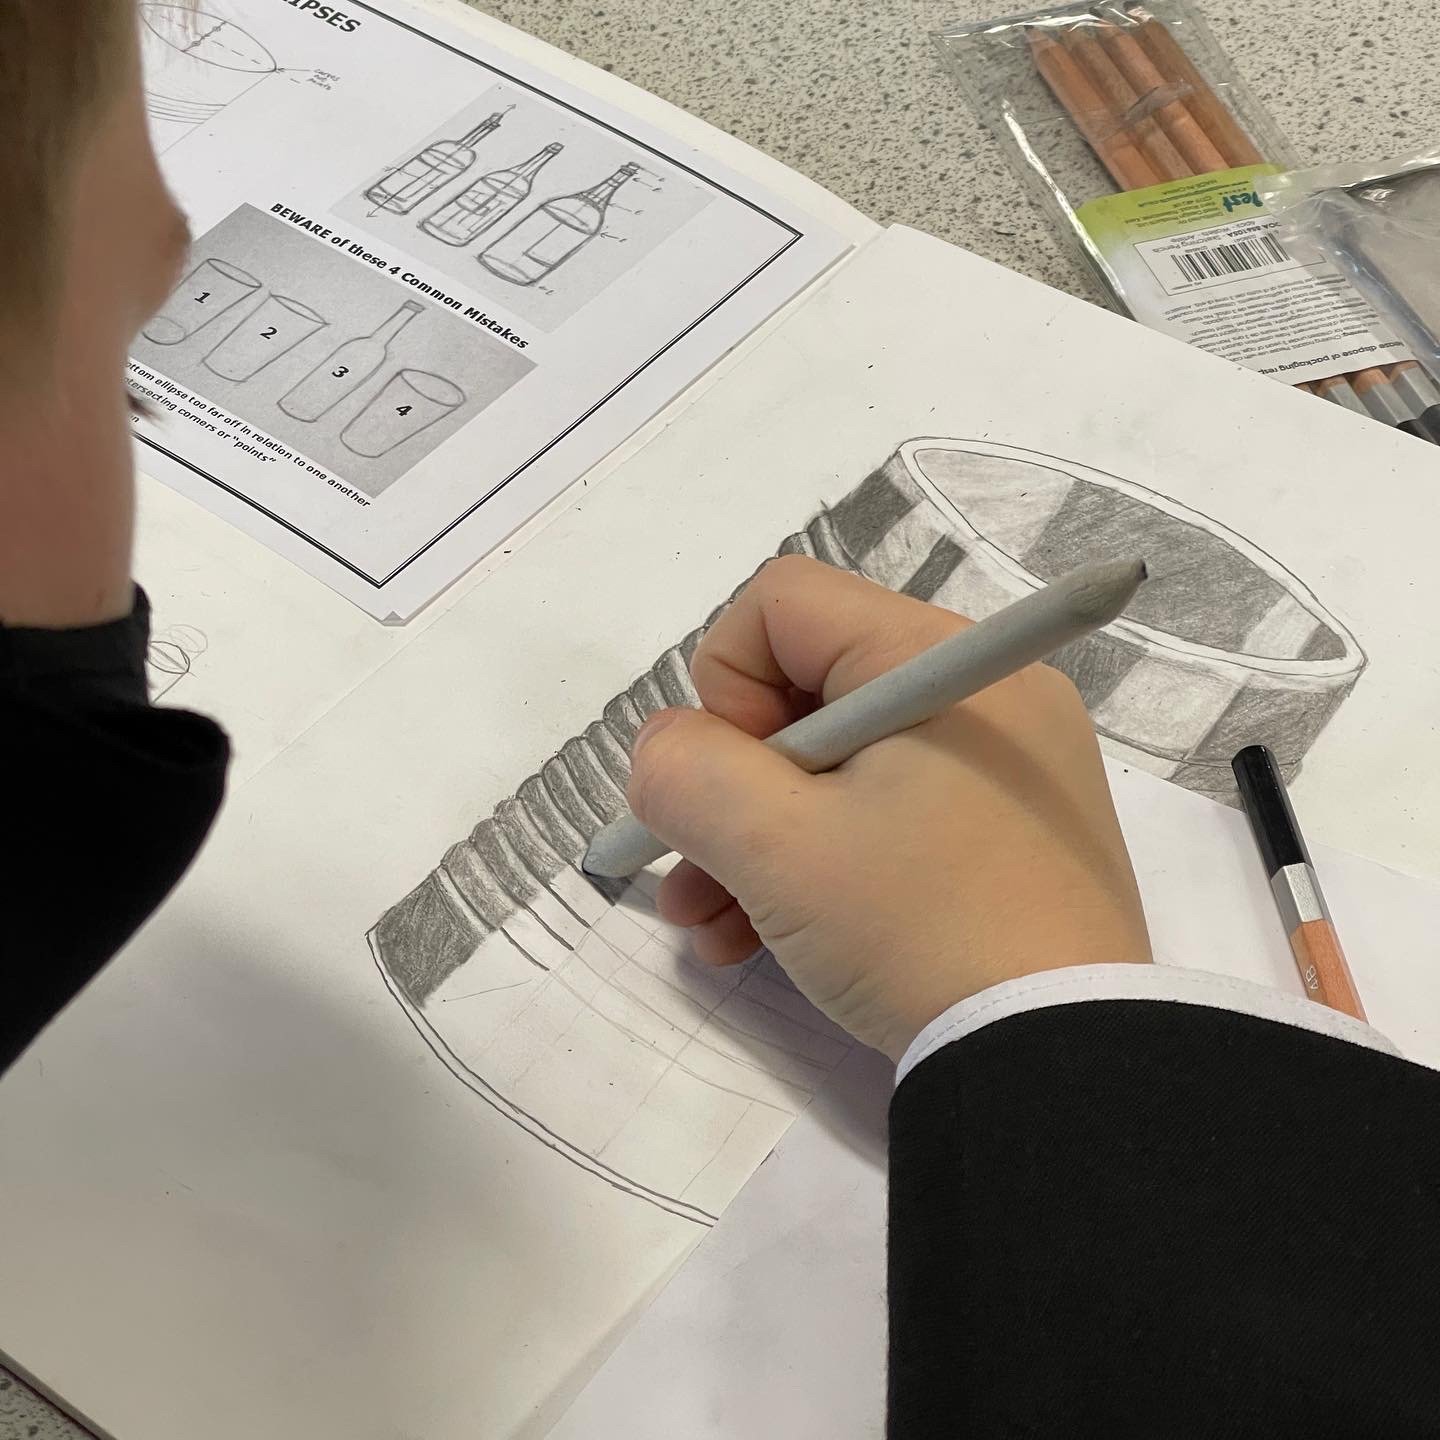
Then working from ‘Ellipse Drawing Handout Sheet’ (this should be stuck in sketchbooks as shown in the example sketchbook pictures below) practice the drawings shown in the video. Later in the lesson you will be issued with some tracing paper in order to check your ellipses as shown in the video below.

Student example 1 - good level of accuracy
Student example 2 - work lacks accuracy, student just seems to start again instead of correcting work
Ellipse Checking video
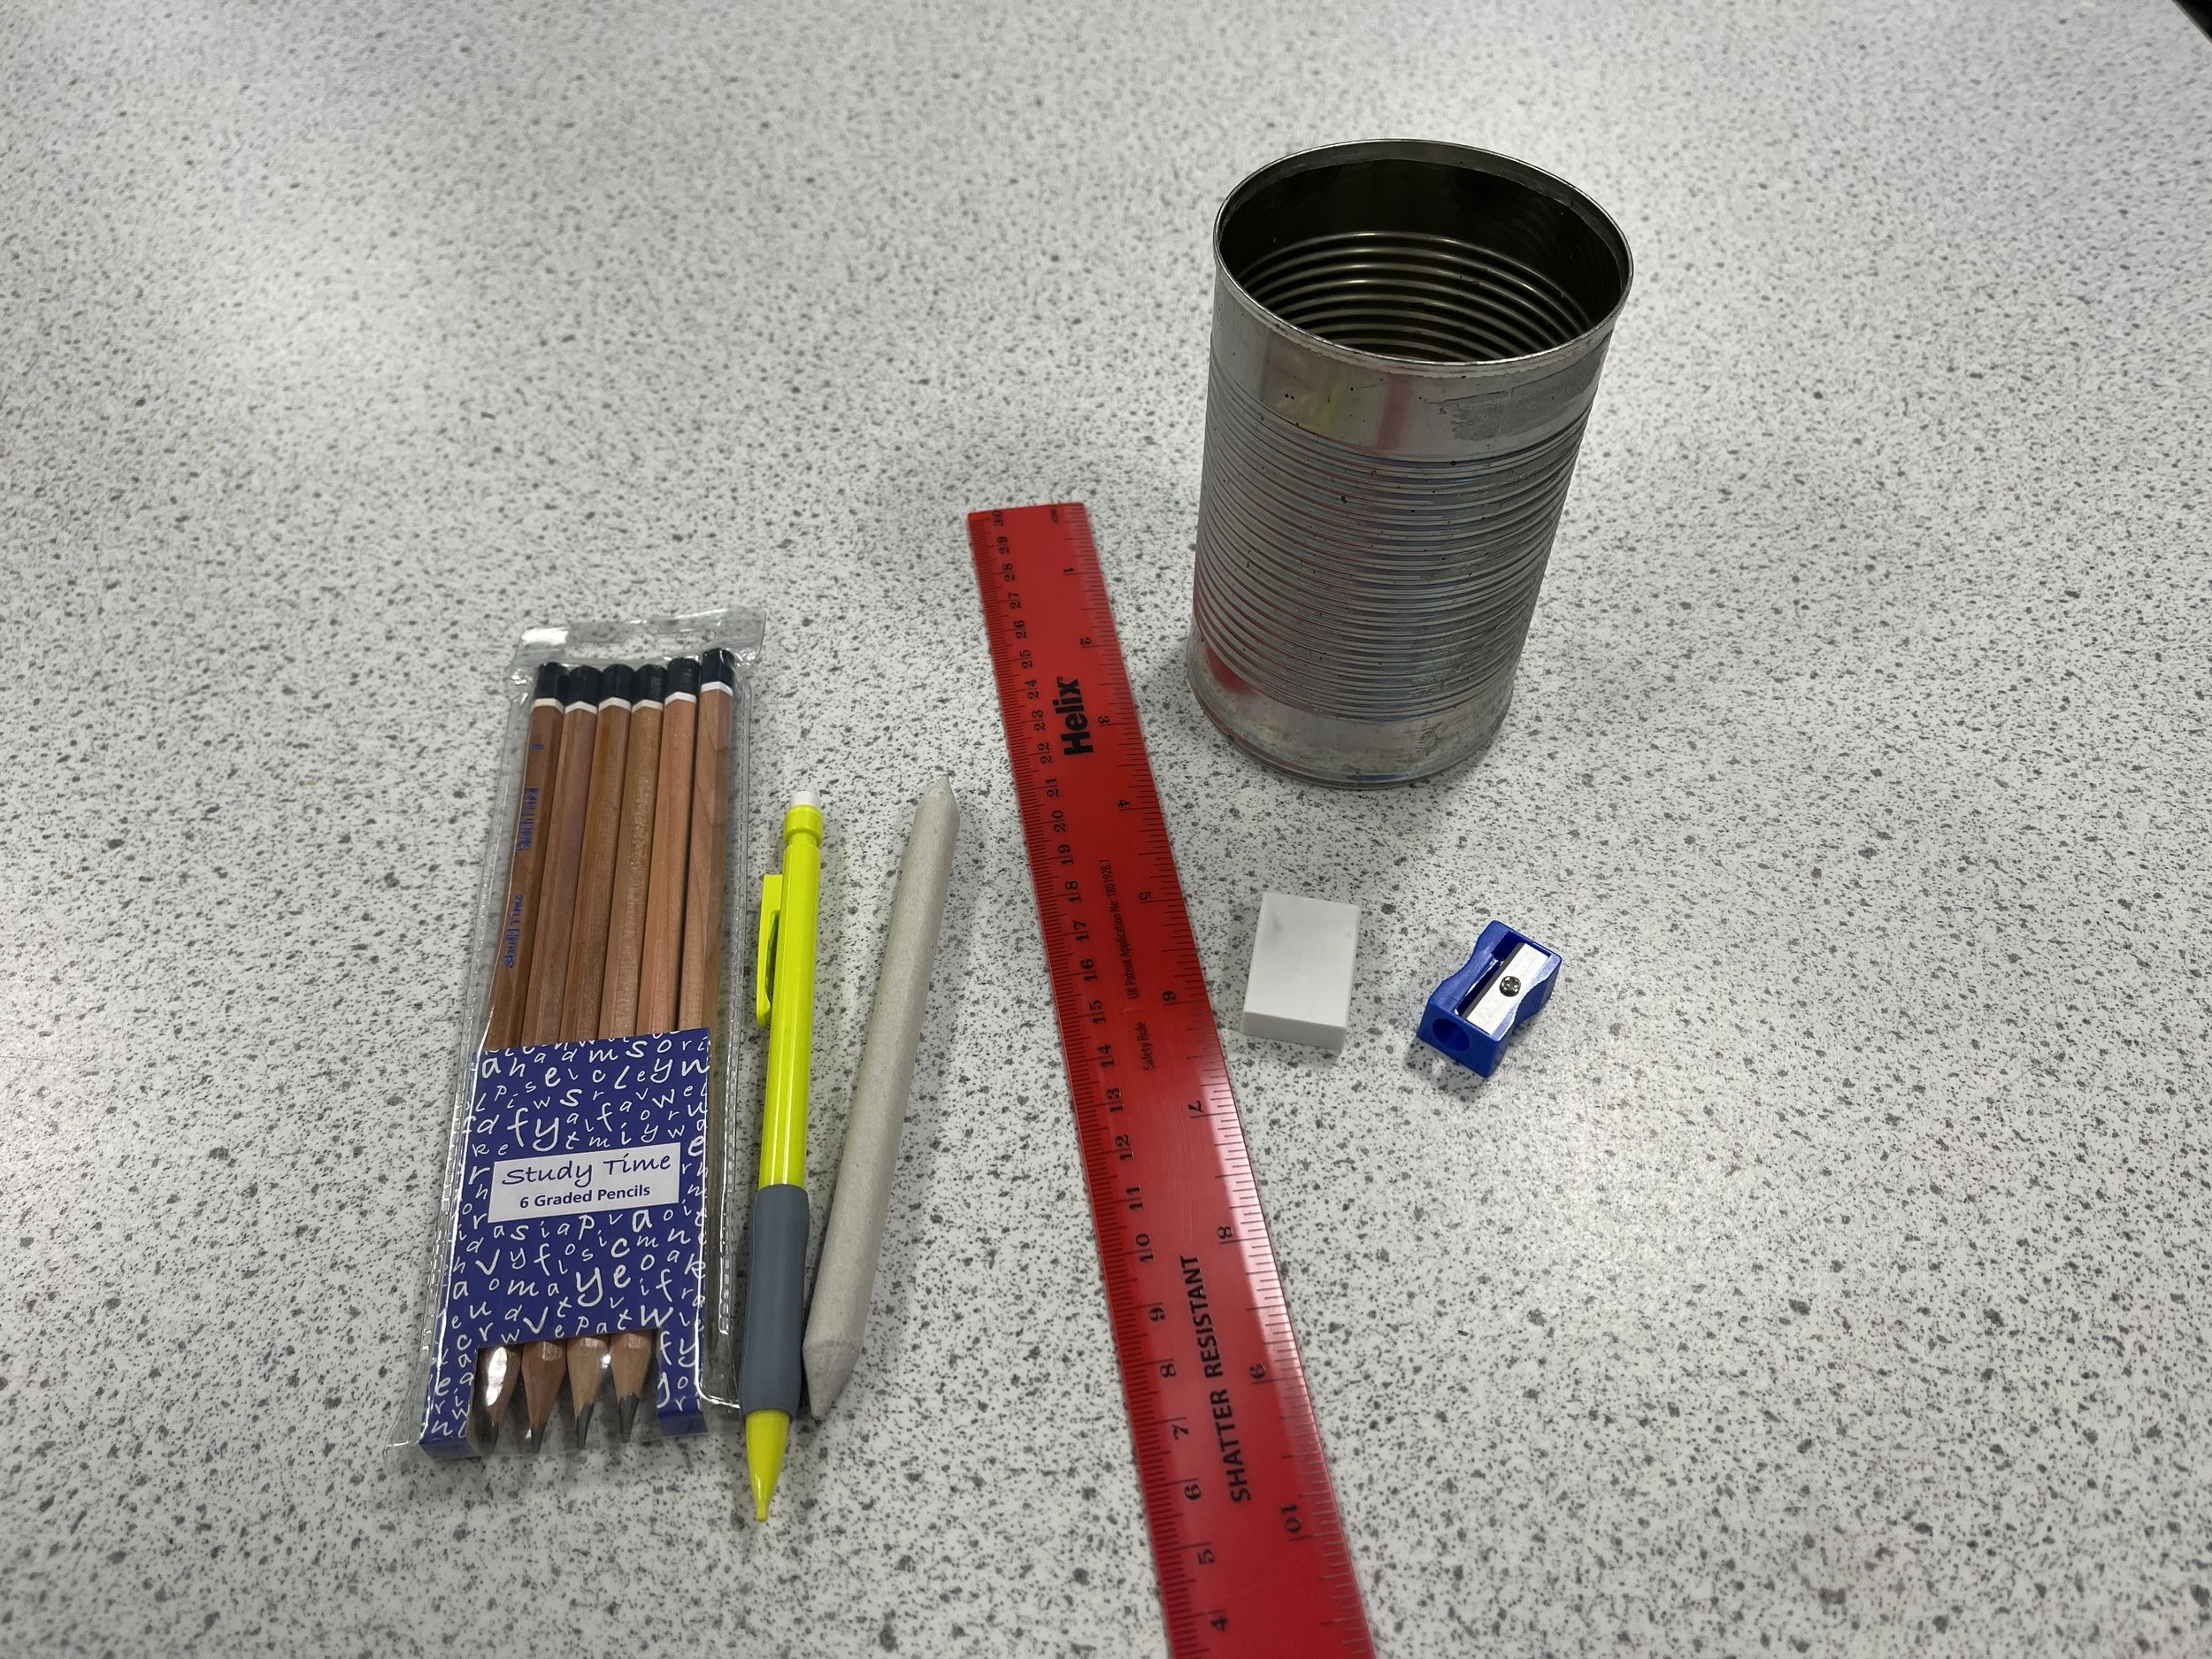
Homework : Complete these practice drawings from the worksheet, using the tracing paper to check the accuracy of the ellipses. Also bring in your drawing equipment (shading pencils, telescopic pencil, stump, eraser, sharpener and ruler). Also bring in an empty clean tin can, as shown in the video, with the label removed (don’t crush it in your bag). The picture below shows the items you will need for the next 4 Art lessons.
Lesson 7
Classwork : Watch the ‘Tin Can Outline’ from the 6mins 10 secs point to the end. Then using the knowledge and skills from last lesson (from drawing the ‘Ellipse Drawing Handout Sheet’) start drawing the actual tin can outline. You should be working life size, or slightly bigger, so measure the height and width of your tin can.
Tin Can Outline
Don’t forget to check your ellipses with tracing paper as shown below.

Trace your first ellipse

2. Check your top ellipse is an exact reflection

3. Check the indentations are the same
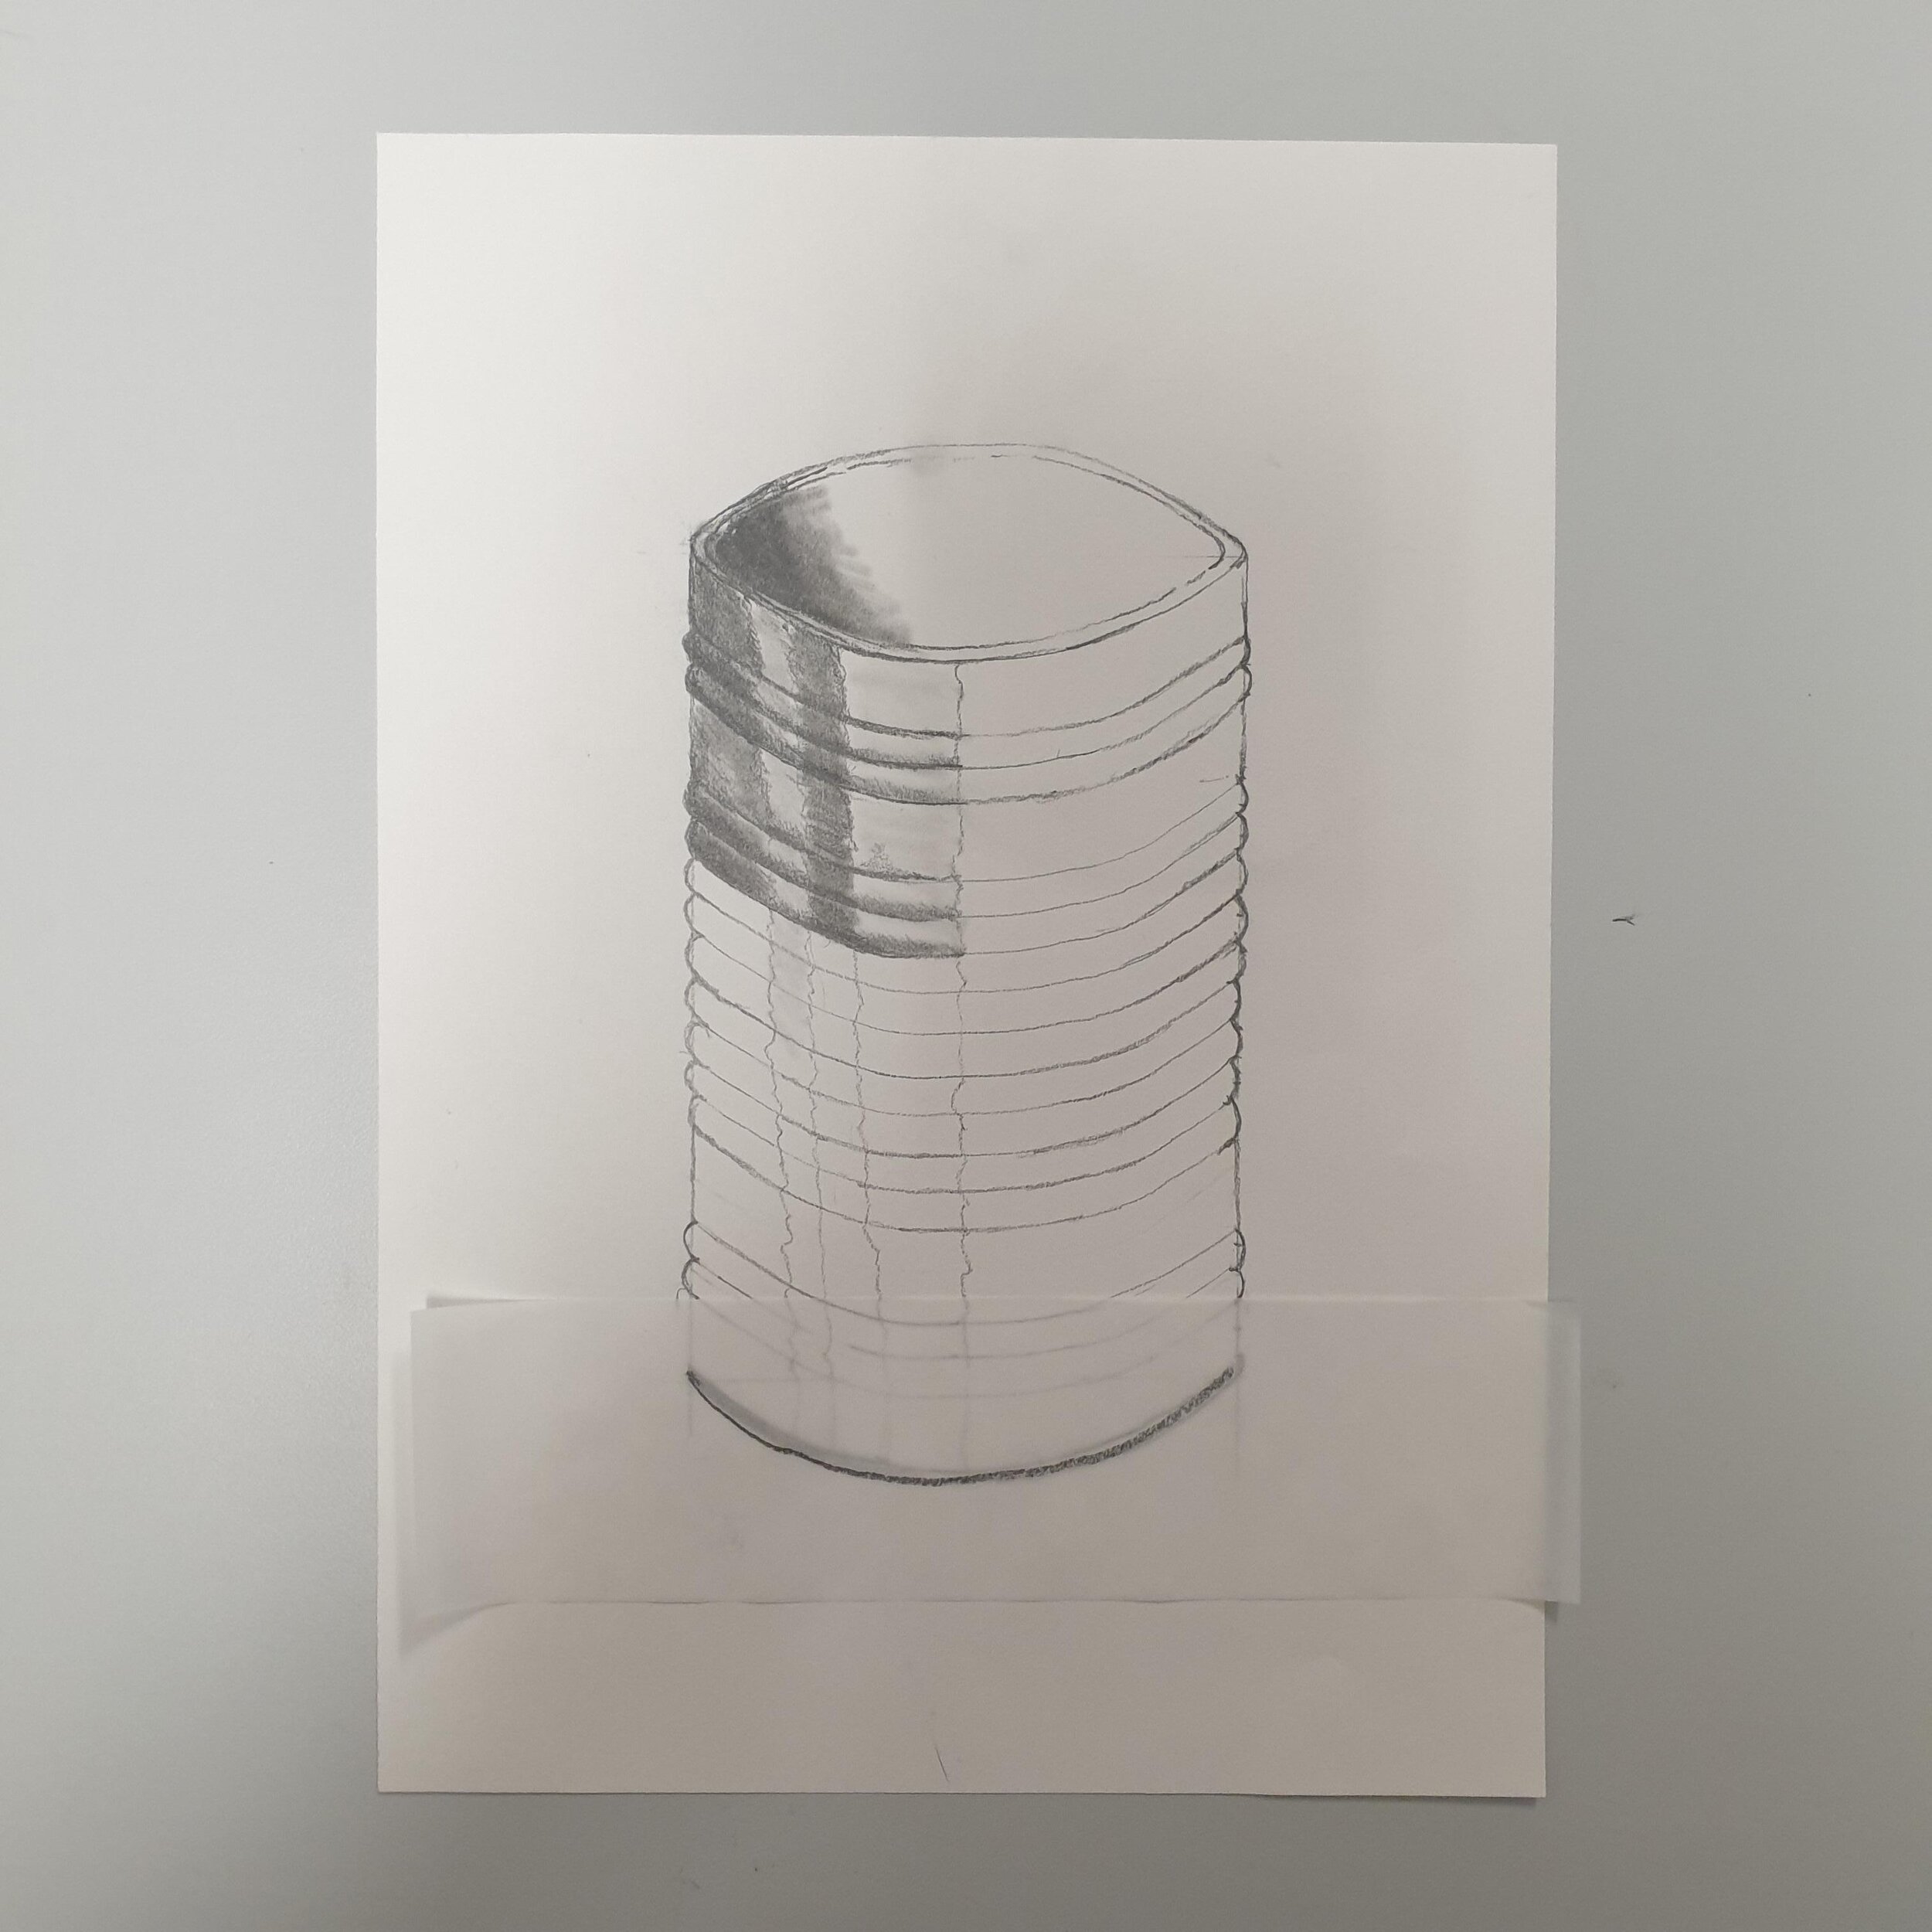
4. Check the bottom ellipse
Homework : Complete the outline of the tin can (do not add any shading). Don’t forget to check your ellipses with tracing paper as shown above. Also bring in your empty tin can for the next lesson so we can start to add tone/shading.
Lesson 8
Classwork : First student should check your tin can ellipses with tracing paper. After this students watch the ‘Tin Can Drawing Assessment Examples’ video and then watch the ‘Tin Can 2 - Shading and Tone ’ video. Start to add tone to the tin can.
Tin Can Drawing Assessment Examples video
Tin Can 2 - Shading and Tone
Homework : Student should aim to complete adding tone and detail to about one third of the tin can. Don’t forget to continually check your ellipses are accurate.
Lesson 9
Classwork : Students should continue to add tone to the remainder of the tin can. Students should continue to check your tin can ellipses with tracing paper and can re-watch the ‘Tin Can 2 - Shading and Tone ’ video from Lesson 8 if need be.
See a variety of good examples below that will need to be completed as homework this week.
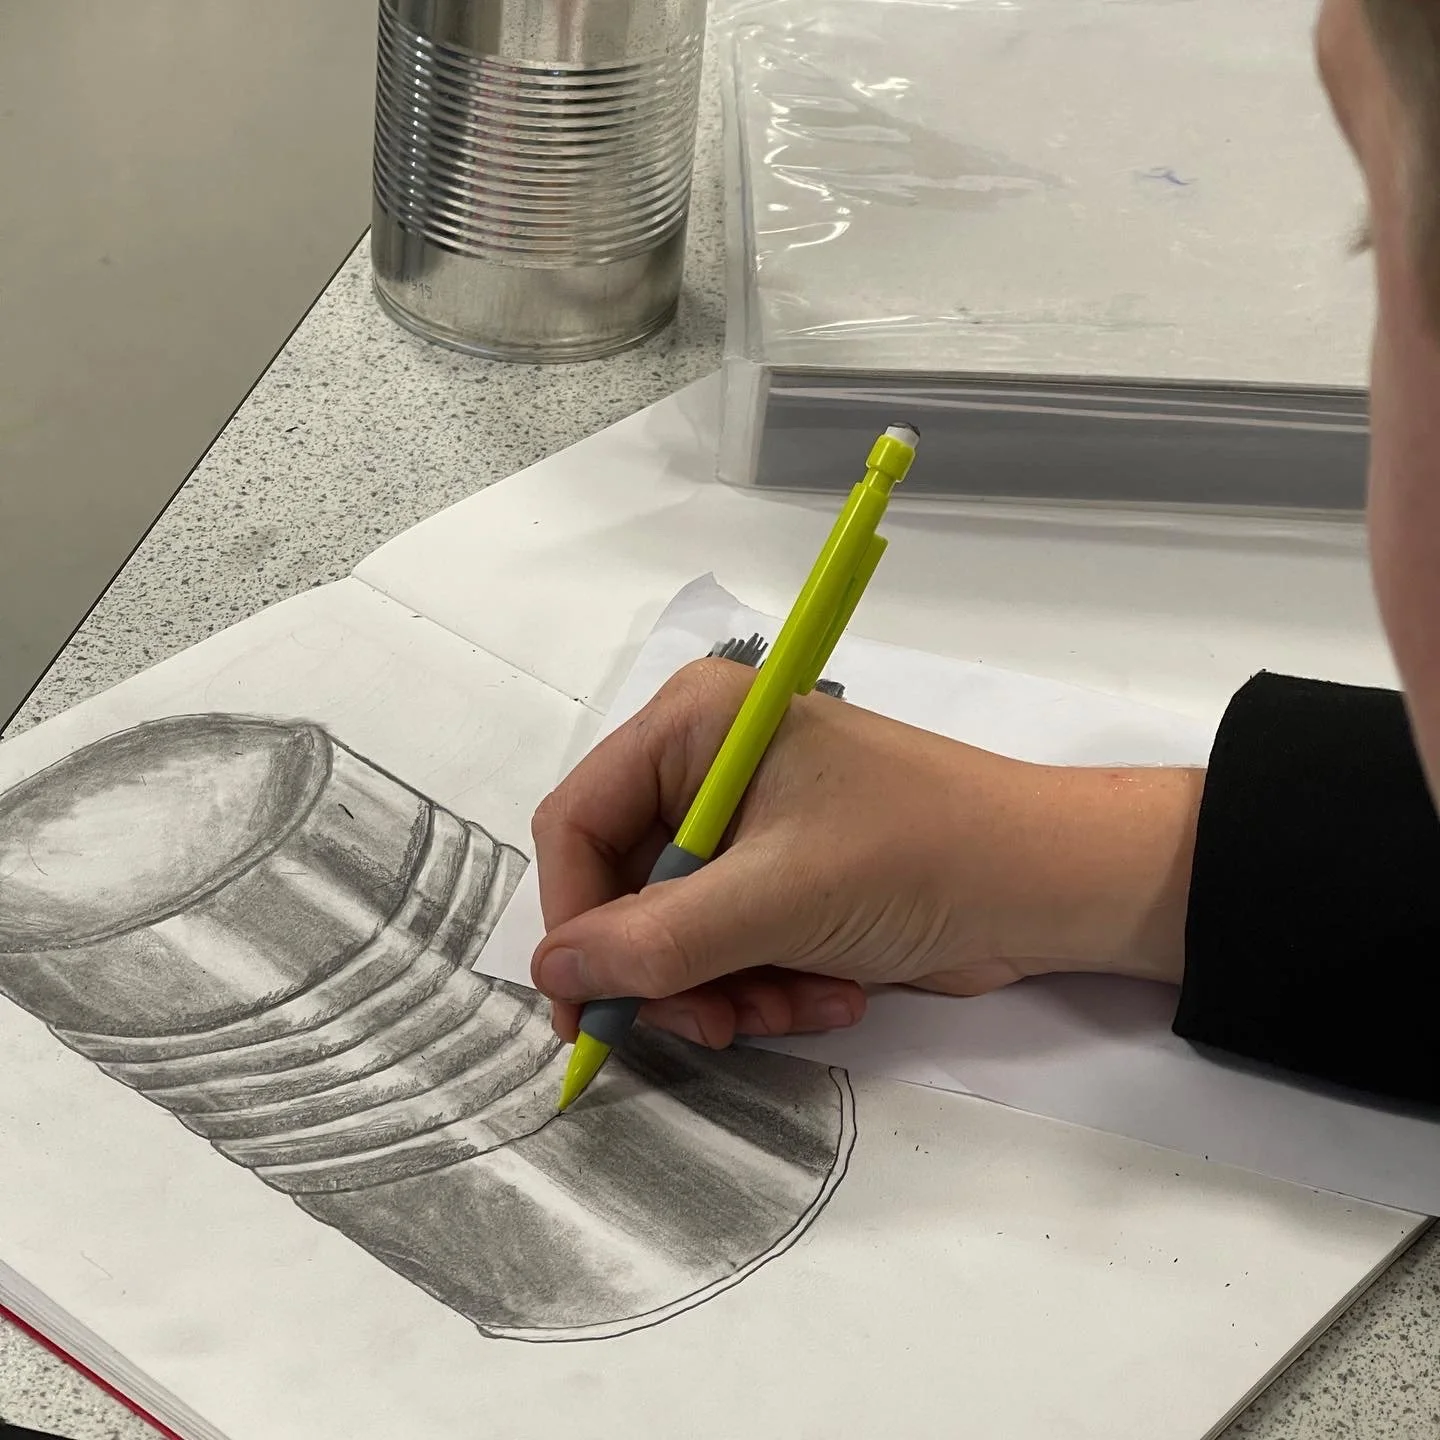
Homework : Student should complete the drawing of the tin can.
Lesson 10
Classwork : Students can improve the tin can drawing or continue with the van Gogh drawing copy.
Homework : Students need to revise for the Artists’ Drawings Test. The pass mark is 80% or (or 16/20) and spelling and learning the artists’ first and second names is important. There will also be 5 bonus questions based on the information contained in the ‘Artists’ Drawings Slide Show’ from lesson 4.
Students should attempt the ‘Artists’ Drawings Practice Test’ below.
Artists’ Drawings Practice Test
Lesson 11
Classwork : Students will complete the ‘Artists’ Drawing Test’. Hopefully they have been successful in the practice test set for homework. The pass mark is 80% (or 16/20). Students will also be issued with the Drawing Evaluation Label.
Homework : Students complete the Drawing Evaluation Label for homework using the video instructions below.
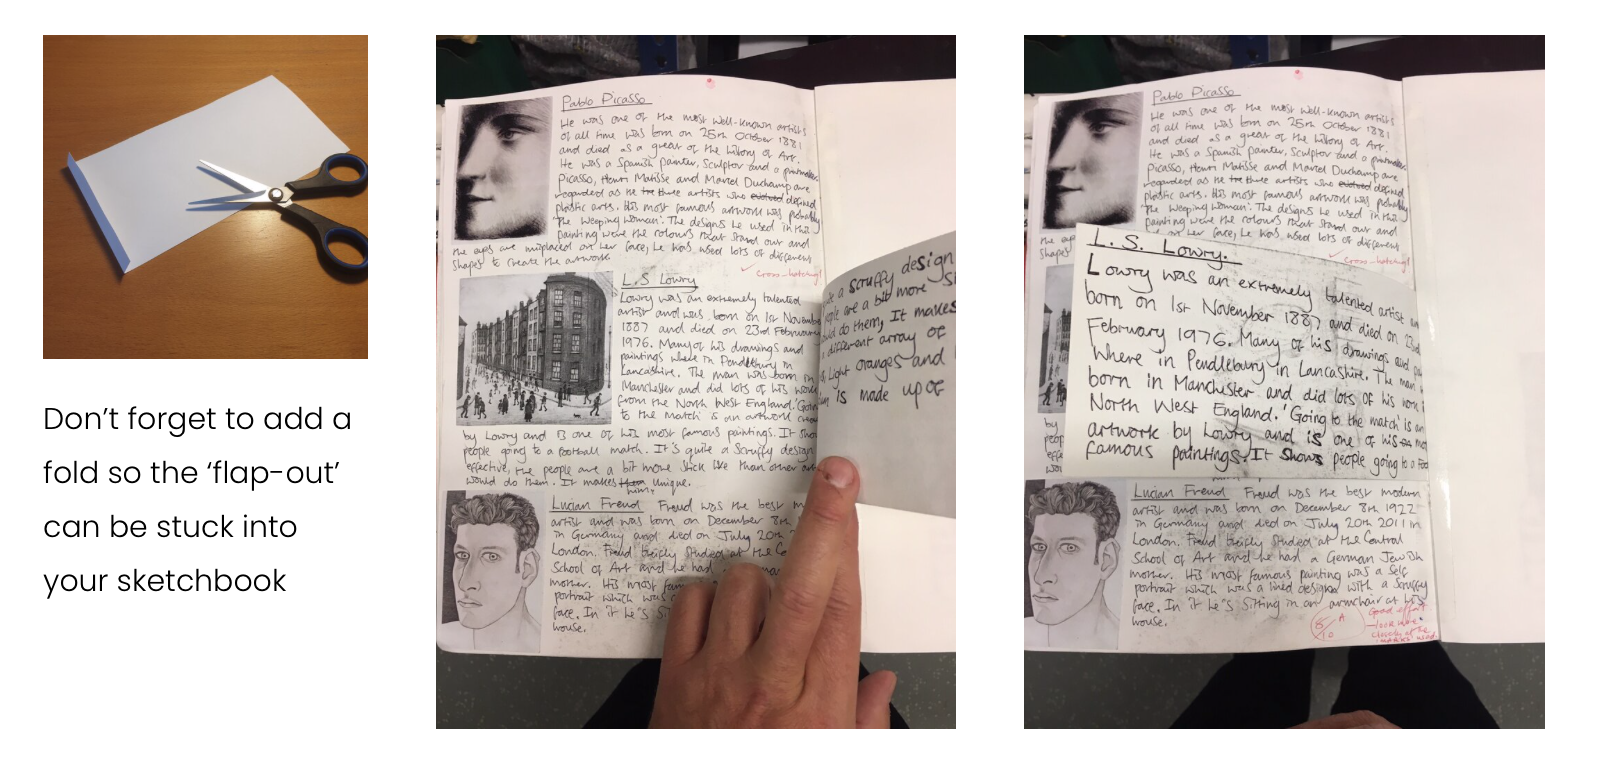
Some students may choose to improve any work they wish before your teacher completes your final Drawing Unit Assessment. If students wish to improve the Artists’ Drawing Research work, rather than trying to complete it all again, they should improve research into just two artists (BUT NOT LOWRY) by adding ‘flap-outs’ to their work. Students need to watch the ‘Artists Drawings Research Improvement Exercise’ video below.
Artists Drawings Research Improvement Exercise
If you do not have any plain paper for the flap-outs you can use paper from the back of your sketchbook.
Ask yourself the following questions,
1. Have I included two or three sentences on the artist’s life?
2. Have I included two or three sentences on the artist’s most famous works?
3. Have I described the drawing stuck in my sketchbook? What does it show/ who is in it, how is it drawn, what techniques and marks have been used? Use terms like lines, dots, scribbles, cross-hatching, hard pencil, soft pencil, loose, detailed, dark, light, contrast, highlights, shadows, shading, blending etc